
The Ultimate Pruning Masterclass: Fruit Trees, Roses, and Ornamental Shrubs
Late winter is the absolute prime window for pruning throughout Northern California. With most plants still resting in deep dormancy, trimming structural limbs minimizes sap loss, deters opportunistic pests, and directs the plant’s stored energy toward explosive, healthy spring growth. However, knowing where and how to cut makes all the difference between a thriving garden and a stressed specimen.
Master the Golden Rules of Clean Pruning
Before you step into the garden with your loppers, keep these fundamental horticultural rules in mind:
-
The Three D’s First: Always inspect your plant and immediately remove wood that is Dead, Damaged, or Diseased. This eliminates potential breeding grounds for fungi and clears your view of the plant’s core structure.
-
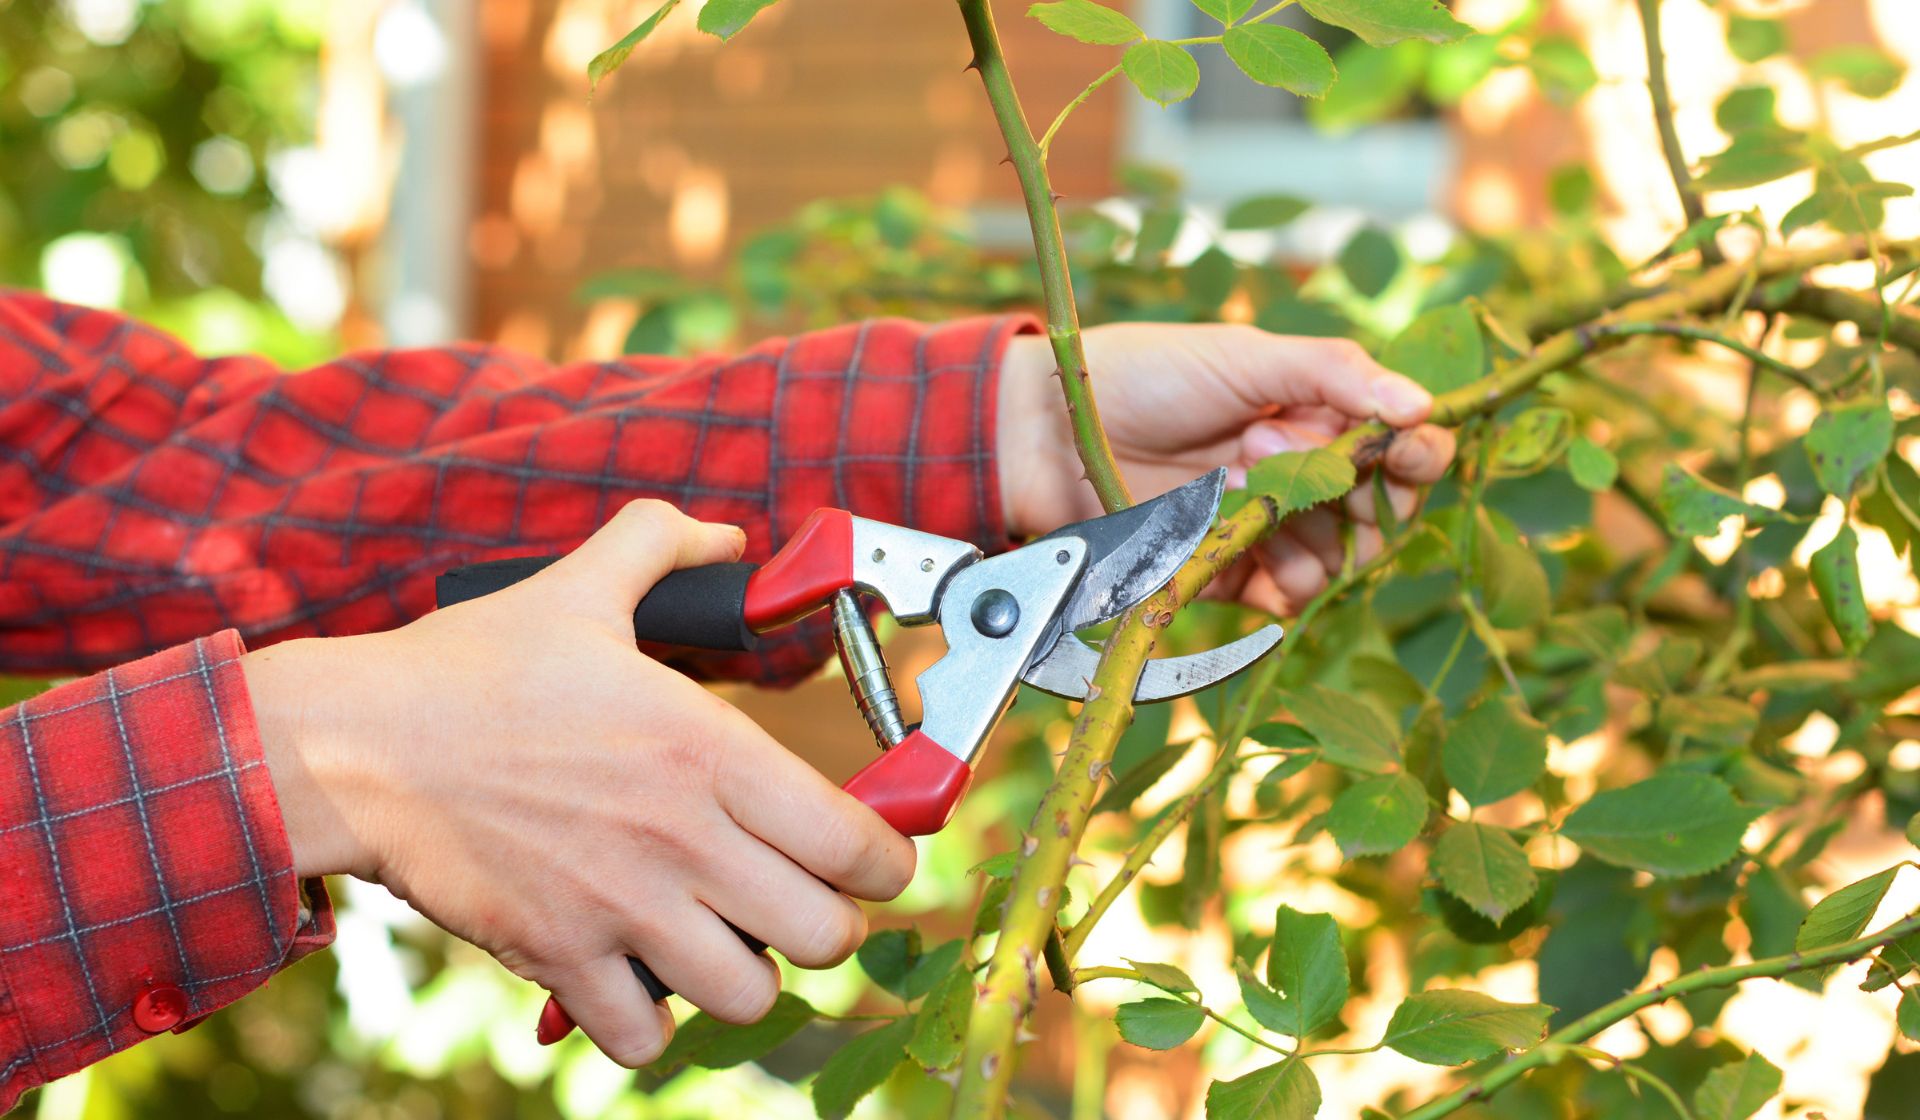
Make Clean Cuts: Never crush or tear stems. Use sharp, well-maintained bypass pruners to ensure clean wounds that heal rapidly.
-
Cut Above a Bud: Always make your cuts at a slight 45-degree angle about a quarter-inch above an outward-facing bud or node. This directs future branching away from the center of the plant, ensuring good air circulation and sunlight penetration.
Specific Care for Roses and Fruit Trees
-
Roses: For hybrid teas and floribundas, cut back overall growth by about a third to half. Remove crossing branches that rub against each other and open up the center of the bush so sunlight can reach every stem.
-
Fruit Trees: Apple, pear, and stone fruit trees require intentional winter shaping. Remove water sprouts (vertical shoots shooting straight up), sucker growth at the base, and any weak or overlapping branches to maximize your summer harvest.
Save your weekends and ensure your valuable plants are trimmed correctly by hiring the professional horticulturalists at DK Landscaping. Contact us today for a consultation!
Pruning Prep: Inspecting and Sharpening Your Tools for Winter Work

Before heavy pruning season shifts into high gear in late winter, taking care of your gardening tools ensures clean cuts, protects your valuable plants from disease, and saves your hands from unnecessary strain. Whether you are tending to sprawling rose gardens or shaping dormant fruit trees, preparation starts in the workshop.
Why Tool Maintenance Matters
Using dull, dirty, or rusted pruners is one of the most damaging mistakes a gardener can make. Dull blades crush and tear plant fibers rather than slicing cleanly through them. These jagged, crushed wounds heal slowly and create massive entry portals for fungal spores, bacteria, and insect pests. Furthermore, dirty blades can easily transmit pathogens from an infected plant to a completely healthy one in a single snip.
Step-by-Step Winter Tool Restoration
-
Thorough Cleaning: Begin by scrubbing away accumulated sap, dirt, and dried plant debris using a stiff wire brush, warm water, and dish soap. For stubborn, sticky resin, use a specialized sap remover or a rag soaked in mineral spirits.
-
Sanitize Blades: Once clean, wipe down all metal surfaces with rubbing alcohol or a 10% bleach solution. This critical step kills lingering bacteria and viruses, ensuring your tools are sterile before touching your prized plants.
-
Sharpen the Cutting Edge: Use a fine-grit diamond sharpening stone or a carbide sharpening tool. Follow the original bevel angle of the blade, making smooth, consistent strokes from the base of the blade to the tip. Test your edge on a piece of paper—it should slice effortlessly without snagging.
-
Lubricate Moving Parts: Apply a few drops of lightweight machine oil to pivot bolts, springs, and locking mechanisms. Wipe away any excess oil with a clean cloth to prevent dust and dirt from sticking to the mechanism.
Inspecting Handles and Springs
While maintaining the blades, take a close look at the rest of your equipment. Check wooden handles for splinters, cracks, or looseness, sanding them down and sealing them with boiled linseed oil if necessary. Inspect coiled springs and locking clasps on loppers and hand pruners, replacing worn-out parts so your tools feel balanced and comfortable during long hours of seasonal yard work.
Save your weekends and ensure your valuable plants are trimmed correctly by hiring the professional horticulturalists at DK Landscaping. Get in touch with us today!
Beating Winter Drought: Smart Drainage and Rainwater Management

January in Northern California often brings intense seasonal storms alternating with unexpected dry spells. While our region desperately needs rainfall, heavy downpours can wreak havoc on an unprotected landscape if water is not managed correctly. Preventing standing water, protecting your home’s foundation, and maintaining proper drainage are your single most important maintenance priorities during this month.
Understanding the Risks of Poor Drainage
When heavy atmospheric rivers dump inches of rain onto clay-heavy Northern California soils in a matter of hours, absorption rates are quickly overwhelmed. Without proper runoff pathways, water pools on lawns, drowns plant root systems, erodes valuable topsoil along slopes, and can ultimately threaten your home’s foundation.
Key Drainage Strategies for Your Property
-
Inspect Property Grading: Walk your yard during or immediately following a heavy downpour. Observe where water naturally flows and ensure the grading slopes securely away from your home’s foundation, basement walls, and patio slabs.
-
Keep Gutters and Downspouts Clear: Overflowing gutters dump massive volumes of water directly beside your house walls. Clean your gutters regularly and extend downspouts using flexible tubing or splash blocks to direct runoff safely toward lawn areas, rain gardens, or designated drainage channels.
-
Install French Drains and Swales: For persistently soggy areas or low spots in the yard, professional subsurface French drains or vegetated swales capture surface and groundwater, routing it harmlessly away from vulnerable plantings and hardscapes.
-
Incorporate Dry Creek Beds: A well-designed dry creek bed combines functional erosion control with stunning visual aesthetics, collecting heavy stormwater runoff and filtering it naturally into the landscape.
Checking Valves and Lines
Even though your automated irrigation system is likely turned off or dialed back significantly for winter, sub-freezing morning temperatures and heavy winter storms can stress backflow preventers, valves, and exposed lines. Walk your property weekly to check for weeping valves, leaky connections, or broken sprinkler heads. Catching these issues now prevents catastrophic water waste, muddy oversaturation, and costly structural repairs when spring arrives.
Need help setting up a reliable drainage system or servicing your irrigation network? Contact David Lee and the experts at DK Landscaping for professional support across Sonoma, Napa, and Marin counties. Contact us today for a consultation!
Designing Warmth: Outdoor Fire Features and Winter Patio Living
Winter evenings in Northern California are often crisp, clear, and perfectly suited for spending time outside—if you have the right setup. Integrating a custom fire feature turns an underutilized winter patio into your home’s favorite gathering space.
1. Fire Pits vs. Outdoor Fireplaces
Choosing the right fire feature depends on how you want to use your outdoor living area:
-
Built-in Fire Pits: Offer a 360-degree interactive social circle, making them ideal for casual family nights, roasting marshmallows, and relaxed entertaining.
-
Custom Stone Fireplaces: Anchor a patio edge and act as an impressive architectural statement piece that radiates directional heat and commands visual attention.
2. Choosing Durable Materials
Winter weather demands materials built to withstand thermal shock and moisture.
-
Opt for heat-resistant natural stone, heavy concrete pavers, and durable flagstone that resist cracking under repeated temperature shifts.
-
Ensure proper patio grading around the feature to prevent winter puddling.
3. Cozy Patio Integration
A fire feature works best when integrated seamlessly into your broader outdoor living design.
-
Pair your fire pit or fireplace with built-in stone seating walls, weather-resistant overhead pergolas, and warm, low-voltage path lighting to complete the sanctuary feel.
Ready to upgrade your outdoor entertainment space for the winter season? Contact the experts at DK Landscaping for custom fire feature installation. Get in touch today!
Winter Architecture: Using Evergreens and Hardscapes for Year-Round Appeal

When plants enter dormancy, many home gardens lose their color and definition. A well-designed landscape solves this by incorporating “winter architecture”—elements that introduce permanent structure, texture, and visual interest even in the dead of winter.
1. The Power of Evergreens
Evergreens form the permanent skeleton of a balanced, year-round garden.
-
Incorporating structural conifers, broadleaf evergreen shrubs (like Manzanita, Toyon, and Ceanothus), and structured hedging plants ensures your yard retains rich strokes of emerald, blue-green, and deep bronze all year long.
-
They provide essential privacy screens when deciduous neighbor trees are bare and serve as a brilliant backdrop for winter-blooming structural plants like camellias.
2. Maximizing Hardscapes and Stone Features
Winter is the season when hardscaping truly takes center stage.
-
Patios, flagstone pathways, dry creek beds, and stone retaining walls introduce geometric lines and organic earthy tones that stand resilient against gray winter skies.
-
Because plants aren’t dominating the visual field, your hardscape features anchor the eye, create distinct focal points, and prevent your property from feeling washed out.
3. Strategic Landscape Lighting
With shorter winter days, outdoor lighting transforms from a luxury into an absolute necessity for safety and visual warmth.
-
Up-lighting architectural tree trunks, casting a soft glow across stone pathways, or accentuating an entryway creates a welcoming oasis that combats the winter gloom.
-
Low-voltage LED systems installed by professionals ensure energy efficiency while highlighting the best structural features of your winter landscape.
Want to transform your property’s year-round curb appeal? Reach out to DK Landscaping to explore hardscaping and structural planting options tailored to your home. Contact us today!
Protecting Tender Plants from Northern California Frosts

While our Mediterranean climate is famously mild, Northern California microclimates can experience sudden overnight frost dips that shock or kill delicate Mediterranean and tropical specimens, young citrus trees, and tender perennials. Preparing early is the key to preventing winter heartache.
1. Identify and Relocate Vulnerable Plants
Potted plants, young citrus trees, and tender succulents are prime candidates for cold damage.
-
Group mobile container plants together in protected spots near warm house walls or under deep eaves where they benefit from radiant nighttime heat.
-
For in-ground tender specimens, map out where frost pockets tend to settle on your property so you can prioritize your protection efforts.
2. Invest in Proper Frost Cloths
When a hard freeze is forecasted, cover vulnerable plants immediately, but choose your materials wisely.
-
Use Breathable Fabrics: Invest in professional frost blankets or burlap.
-
Avoid Plastic Sheeting: Never let direct plastic touch plant foliage without a supportive frame; plastic traps moisture and conducts cold, effectively burning the leaves it touches.
-
Secure weights or stones firmly along the edges of your covers so gusty winter winds don’t blow them away in the middle of the night.
3. Manage Soil Moisture Before Freezing Nights
It counterintuitive to some, but damp soil is one of the best defenses against a hard frost.
-
Ensure your soil is adequately moist (not waterlogged) the day before a predicted freeze.
-
Why it works: Moist soil absorbs significantly more solar radiation during the day and radiates that heat upward into the plant canopy during freezing nighttime hours than dry, dusty soil does.
Need help winterizing delicate landscape features or designing a frost-resilient garden layout? Let the experts at DK Landscaping safeguard your property this season. Contact us today!
Putting Your Garden to Bed: Essential Fall Winterization Steps

When autumn leaves begin to drop and morning temperatures take on a crisp edge, your landscape requires a deliberate shift in maintenance. November is the ideal time to clean the slate and set your soil up for success before heavy winter rains arrive.
1. Perform a Thorough Deep Clean
Just like a thorough indoor house cleaning, your garden needs a clean slate heading into winter.
-
Clear out spent summer annuals and weed your garden beds thoroughly.
-
Remove accumulated debris and fallen leaves from the crowns of sensitive perennials.
-
Why it matters: Leaving decaying organic matter piled directly against plant stems invites fungal diseases, slugs, and overwintering insect pests. (Healthy, disease-free leaves can be chopped and saved for your compost pile).
2. Apply a Protective Blanket of Mulch
If there is one golden rule for winterizing a Northern California landscape, it is mastering mulch. A 2-to-3-inch layer of organic mulch acts as a natural thermal blanket for your soil.
-
It insulates delicate root systems against sudden temperature drops.
-
It prevents heavy winter rains from compacting the topsoil and washing away vital nutrients.
-
It suppresses winter weed germination.
-
Pro Tip: Always keep mulch a couple of inches away from the direct trunks of trees and shrubs to prevent collar rot and moisture buildup.
3. Make Smart Irrigation Adjustments
With shorter days and increased chances of seasonal rainfall, your landscape’s water needs drop dramatically. Leaving automatic sprinkler timers on a summer schedule during late autumn is a recipe for root rot and wasted water.
-
Scale back your irrigation frequency and duration significantly.
-
Inspect your smart controller or rain sensor to ensure it responds accurately to local precipitation.
-
Water deeply but much less often to encourage root systems to stay anchored deep underground.
Ready to trade hours of weekend yard work for professional results? The team at DK Landscaping specializes in sustainable, seasonal landscape maintenance across Sonoma, Napa, and Marin counties. Contact us today for a consultation!
Planting for Spring: Bulbs and Cool-Season Annuals to Add in October

1. Spring-Blooming Bulbs: A Promise of Early Color
- Choose healthy, firm bulbs free of mold or damage.
- Plant at the right depth: Generally, bulbs should be planted two to three times as deep as their height (for example, a 2-inch bulb goes 4–6 inches deep).
- Group bulbs in clusters for a natural, dramatic effect rather than single rows.
- Water thoroughly after planting to settle the soil and encourage rooting.
2. Cool-Season Annuals for Fall and Early Spring Interest
- Plant annuals in well-drained soil amended with compost.
- Water regularly, especially during dry spells.
- Deadhead spent flowers to encourage continuous blooming.
3. Add Texture and Structure with Ornamental Grasses
4. Mulch and Protect New Plantings
5. Plan for Succession
Trust DK Landscaping for Expert Planting
Essential Fall Clean-Up Tips for a Healthy Landscape
1. Remove Fallen Leaves Regularly
2. Cut Back Perennials and Clean Up Beds
3. Prune Trees and Shrubs
4. Refresh Mulch and Protect Roots
5. Prepare Your Lawn and Equipment
6. Plan Ahead for Spring
Let DK Landscaping Handle the Heavy Lifting
September Lawn Recovery: Repairing Summer Damage for a Greener Fall