

Posts Tagged DK Landscaping
The Secret to Healthier Fruit Trees and Roses: A Guide to Dormant Spraying

As the late autumn winds sweep through Sonoma, Napa, and Marin counties, the vibrant foliage of your fruit trees and ornamental roses begins to yellow, wither, and drop to the ground. To the casual observer, a bare tree in November looks like a tree that has safely gone to sleep for the winter. The garden appears quiet, still, and entirely inactive.
However, professional horticulturalists know that this peaceful appearance is a complete illusion.
The bark, deep crevices, and surrounding soil of your dormant plants are actually teeming with microscopic life—and not all of it is beneficial. If you battled aphids, scale, spider mites, rust, or powdery mildew during the frantic growing season of summer, those problems did not simply disappear when the weather got cold. The adult insects may have died off, but they strategically left behind thousands of microscopic eggs tucked safely into the rough, protective bark of your trees. Similarly, fungal spores are actively overwintering on the bare branches, just waiting for the warm, wet days of early Northern California spring to explode back into action.
If you ignore your trees and roses all winter, you are virtually guaranteeing a massive pest and disease outbreak next spring. The single most effective way to break this destructive cycle, protect your landscape, and guarantee a healthier, more productive garden next year is by executing a proactive, professional strategy known as Dormant Spraying.
What Exactly is Dormant Spraying?
Dormant spraying is the precise application of preventative treatments to deciduous trees and shrubs during their period of deep winter dormancy.
During the spring and summer, plants are covered in tender, sensitive green leaves. If you were to apply heavy oils or strong fungicides during July, the intensity of the sun combined with the chemicals would scorch the foliage and severely damage the plant. However, because a deciduous tree drops its leaves in late autumn and stops actively growing, its woody structure can safely tolerate much stronger, more highly concentrated treatments.
By aggressively treating the bare branches, trunk, and crotches of the plant now, you effectively suffocate overwintering insect eggs and eradicate lingering fungal spores before they ever have a chance to wake up and wreak havoc.
The Invisible Threat: What Are We Fighting?
Understanding what you are targeting is crucial for a successful winter application. In Northern California’s Mediterranean climate, our mild winters allow several highly destructive pests and pathogens to survive easily until spring.
-
Overwintering Insects: Aphids, spider mites, and scale insects are the most common culprits. Scale insects, in particular, look like tiny, harmless brown bumps on the bark of your fruit trees and roses, but they will hatch in the spring to suck the vital sap directly out of your plants. We are also targeting the eggs of the Peach Twig Borer and various leafroller caterpillars.
-
Fungal Pathogens: The damp, cool winters of Sonoma and Marin counties create the perfect breeding ground for aggressive fungal diseases. We are specifically targeting the spores responsible for Peach Leaf Curl (which causes the leaves of stone fruits to emerge blistered and deformed), Shot Hole Fungus, Fire Blight, and the dreaded Black Spot that defoliates ornamental roses.
The Two-Part Professional Arsenal: Oils and Fungicides
A comprehensive, professional-grade dormant spray program does not rely on a single product. Instead, it utilizes a powerful one-two punch consisting of horticultural oils and copper-based fungicides.
1. Horticultural Dormant Oils (The Insect Eradicator) Dormant oil is a highly refined petroleum or plant-based oil that is mixed with water and sprayed over the entire structure of the tree.
-
How it works: Unlike broad-spectrum chemical pesticides that act as nerve toxins, dormant oil works purely mechanically. It coats the branches in a microscopic, impenetrable layer of heavy oil that literally smothers and suffocates overwintering insect eggs, mites, and soft-bodied pests. Because it prevents oxygen transfer, the insects cannot build a resistance to it.
-
Eco-Friendly and Safe: Because dormant oil acts mechanically and leaves no toxic chemical residue behind, it is highly favored in Integrated Pest Management (IPM) and organic gardening. Once the oil dries on the bark, it poses absolutely zero threat to the bees, ladybugs, and beneficial pollinators that will eventually visit your garden in the spring.
2. Copper Fungicides (The Disease Destroyer) While horticultural oil handles the insect eggs, liquid copper fungicide handles the microscopic diseases.
-
How it works: Copper is a naturally occurring element that disrupts the cellular proteins of fungal spores, preventing them from germinating and spreading. It is the absolute ultimate preventative measure for stone fruits and ornamental roses.
-
The Application: Depending on the specific product formulation and the severity of your garden’s issues, copper is often applied a few weeks after the dormant oil, or they can be carefully tank-mixed together for a single, powerful application.
The Step-by-Step Guide to a Perfect Application
Executing a dormant spray is not as simple as filling a bottle and spraying the yard. In Northern California, timing, weather conditions, and prep work are absolutely critical for success.
Step 1: Prep and Prune Never spray a messy tree. Before applying any product, you must prune the plant. Remove any dead, damaged, or diseased wood. Cut away crossing branches to open up the canopy. Most importantly, rake up and completely remove all fallen leaves and mummified fruit from the base of the tree. Fungal spores overwinter heavily in this leaf litter, and leaving it on the ground will re-infect the tree the moment the spring rains arrive.
Step 2: Checking the Weather Window You cannot just spray on any random weekend in November.
-
Wait for Total Dormancy: You must wait until the tree or rose bush has dropped at least 90% of its leaves.
-
Find a Dry Window: You need a guaranteed window of dry weather. Do not spray if rain is forecasted within the next 24 to 48 hours. Heavy rain will simply wash the expensive product off the bark and into the soil before it has time to work.
-
Monitor the Temperature: Never spray if the overnight temperature is expected to dip below freezing (32°F) within 24 hours of the application. Freezing temperatures can cause the oil emulsion to separate, which can severely damage the bark of the tree. The absolute sweet spot is a calm, dry, overcast morning with temperatures sitting comfortably in the 50s.
Step 3: The Application Technique When spraying, coverage is everything. Overwintering pests are masters of hiding in the tiniest cracks, crevices, and pruning scars. Using a high-pressure pump sprayer, you must coat the entire plant from the top of the canopy all the way down to the soil line. You are aiming for the “point of runoff”—meaning the bark is completely saturated and the liquid is just beginning to drip off the branches. Pay special attention to the crotches of the branches and the rough bark on the main trunk, as this is where pests lay the highest concentration of eggs.
Tailoring the Spray to Specific Plants
Not every plant in your yard needs a dormant spray. This treatment should be highly targeted to the species that benefit most:
-
Stone Fruits (Peaches, Nectarines, Cherries, Plums, Apricots): These are the most vulnerable trees in any Northern California orchard. They absolutely require a copper fungicide spray to prevent Peach Leaf Curl and Shot Hole fungus. For severe cases, a second application in late January just before the buds swell is highly recommended.
-
Pome Fruits (Apples and Pears): These trees are highly susceptible to scale, aphids, and codling moth overwintering. A heavy application of horticultural oil in late November is essential for a clean, worm-free apple harvest the following autumn.
-
Ornamental Roses: Roses are notoriously prone to Black Spot, rust, and powdery mildew. After giving your roses their hard winter pruning and removing all remaining foliage by hand, drench the bare canes and the immediate surrounding soil with a copper and oil mixture to sanitize the bed for spring.
Handling concentrated horticultural sprays, climbing ladders with pressurized equipment, and timing the weather perfectly requires expertise. If applied incorrectly, at the wrong dilution, or on the wrong day, you can accidentally severely damage your prized trees. Protect your valuable fruit trees and ornamental roses by letting the trained professionals at DK Landscaping manage your winter dormant spraying program. We utilize commercial-grade, eco-friendly treatments that guarantee a healthier, more vibrant landscape come spring.
Autumn Clean-Up and Leaf Management: Turning Yard Waste into Garden Gold

As October arrives in Sonoma, Napa, and Marin counties, the landscape undergoes a dramatic and beautiful transformation. The intense heat of summer is finally a memory, the air is crisp, and the canopy of deciduous trees begins to turn brilliant shades of gold, amber, and burgundy.
However, as those beautiful leaves inevitably detach and blanket your property, they signal the beginning of one of the most labor-intensive seasons in landscaping: the autumn clean-up. For decades, the standard homeowner approach to fall clean-up has involved hours of backbreaking raking, stuffing yard waste into plastic bags, and dragging them to the curb to be hauled away to a municipal facility.
Professional horticulturalists want you to stop doing this immediately.
When you bag up your fallen leaves and throw them away, you are literally throwing away the best, most nutrient-rich, and entirely free soil amendment your property will ever produce. By shifting your perspective and learning how to properly manage this autumnal abundance, you can turn yard waste into “garden gold,” dramatically improving the health, structure, and drought resilience of your soil for years to come.
The True Value of Fallen Leaves
To understand why leaves are so valuable, you have to look at how a tree functions. Throughout the spring and summer, a tree uses its massive root system to mine deep into the subsoil, extracting essential minerals like calcium, phosphorus, magnesium, and potassium. It pulls these nutrients all the way up the trunk and stores them in the leaves to aid in photosynthesis.
When the tree drops its leaves in the fall, up to 80% of those hard-earned nutrients fall to the ground with them. In a natural forest ecosystem, nobody rakes the leaves. They fall to the forest floor, decay, and return those nutrients directly back to the tree’s root zone, creating a perfect, self-sustaining loop. When you rake those leaves and throw them in the trash, you break the loop, starving your soil and forcing yourself to buy expensive chemical fertilizers next spring to replace what you just threw away.
Mulching Mower Magic: Protecting the Turf
While leaves are fantastic for the soil, they are terrible for your lawn if left unmanaged. A thick, wet blanket of whole leaves sitting on top of your turfgrass will block vital sunlight, trap moisture, and rapidly breed fungal diseases like snow mold. It will literally suffocate the grass underneath it.
Instead of raking the lawn, the best strategy is to use a mulching mower.
-
How it works: A mulching mower uses a specialized blade that cuts the leaves into tiny, dime-sized fragments before blowing them deep down into the turf canopy.
-
The Benefit: These tiny fragments settle near the soil surface where they are rapidly consumed by earthworms and soil microbes. Within a matter of weeks, the shredded leaves decompose entirely, adding a massive boost of organic matter and nitrogen directly to the grassroots.
-
The Rule of Thumb: You can safely mulch leaves into your lawn as long as you can still see the green grass blades poking through after you mow. If the leaf drop is so heavy that the grass is entirely buried even after mowing, you will need to bag the excess.
Creating Leaf Mold for Garden Beds
If you have massive oak, maple, or liquidambar trees, a mulching mower might not be enough to handle the sheer volume of leaves. This is where your garden beds come into play.
Rake the excess leaves out of your yard and run them over with the mower to shred them, or use a dedicated leaf shredder. Once shredded, spread a 2-to-3-inch layer of this material directly over the bare soil in your perennial beds, vegetable gardens, and under the drip lines of your trees.
Over the winter, this layer will break down into “leaf mold”—a dark, crumbly, earthy-smelling substance that works miracles on Northern California clay. Leaf mold forces tightly packed clay particles apart, dramatically improving drainage and allowing oxygen to reach plant roots. More importantly, it acts like a sponge, increasing the soil’s water-holding capacity, which is vital for surviving our dry summers.
Perennial Cutbacks: What to Chop and What to Leave
October clean-up also involves managing your herbaceous perennials. As the temperatures drop, plants like hostas, peonies, and daylilies will turn yellow and die back to the ground.
-
Clean up the mush: Any foliage that turns soft, mushy, or slimy (like hostas) should be cut cleanly at the base and removed. Leaving rotting vegetation on top of the plant crown invites slugs and crown rot during the wet winter months.
-
Leave structural stems for wildlife: Do not cut back everything! Perennials with stiff, upright seed heads—like Coneflowers (Echinacea), Black-Eyed Susans (Rudbeckia), and ornamental grasses—should be left standing all winter. They provide crucial architectural interest when the rest of the garden is bare, and their seeds provide a vital winter food source for local songbirds.
Autumn clean-up is physically demanding work, and properly processing leaves requires the right commercial equipment. Let the professional crews at DK Landscaping handle the heavy lifting. We will meticulously clean your property, process your leaves into soil-building mulch, and prep your garden for a healthy winter. Contact us today to schedule your fall clean-up!
The Second Spring: Why Fall is the Absolute Best Time to Plant Trees and Shrubs

If you walk into any big-box home improvement store in April, you will be overwhelmed by towering displays of fertilizer, endless rows of blooming flowers, and massive marketing campaigns telling you that spring is the ultimate time to plant. Because of this, the vast majority of homeowners in Sonoma, Napa, and Marin counties believe they have missed their window if they don’t get their new trees and shrubs in the ground before Memorial Day.
However, professional horticulturalists and landscape designers know a closely guarded secret about our unique Northern California climate: Spring is actually the second best time to plant.
The absolute best time to fundamentally transform your landscape, install large structural trees, and plant perennial shrubs is right now, during the months of September and October. In the landscaping industry, we refer to this golden window as the “Second Spring.” Understanding why fall planting is so successful is the key to building a resilient, fast-growing, and drought-tolerant landscape.
The Science of Fall Planting: Warm Soil, Cool Air
To understand why fall planting is superior, you have to look at what a plant experiences when it is taken out of its plastic nursery pot and placed into the ground.
When you plant in May, the soil is still relatively cool from winter, but the air temperature is rapidly rising. As the summer sun beats down on the tender new foliage, the plant desperately tries to pull water from its roots to cool itself. However, because the plant was just put in the ground, its root system is still confined to the exact shape of its nursery pot. It hasn’t had time to spread out into the surrounding soil. This leads to massive transplant shock, requiring you to water the plant constantly just to keep it on life support through August.
When you plant in September, the dynamic is completely reversed.
-
The Air is Cooling: The intense, scorching heat of summer is finally breaking, and the days are getting noticeably shorter. The plant’s leaves are no longer under severe physiological stress from the sun, meaning the plant stops focusing its energy on canopy growth and cooling.
-
The Soil is Baking Hot: While the air is cooling down, the soil underground has been absorbing solar radiation for the last four months. The soil is incredibly warm.
This combination—cool air and warm soil—triggers a biological reaction in trees and shrubs. The plant stops growing new leaves above ground and instead pumps 100% of its stored energy into explosive root growth beneath the surface.
The Winter Rain Advantage
By planting in September, you give your new trees and shrubs a massive head start. They spend all of October and November rapidly pushing their roots deep into the warm soil.
Then, the Northern California winter arrives. As the atmospheric rivers and seasonal rains begin to fall, your new plants receive months of deep, slow, perfectly timed irrigation entirely courtesy of Mother Nature. Because the roots are already established from their fall planting, they drink in this winter moisture, anchoring themselves even deeper into the subsoil.
When actual spring arrives the following year, a fall-planted shrub will completely outpace a spring-planted shrub. The fall-planted specimen already has a massive, established root system ready to support a spectacular flush of new leaves and spring flowers, while the spring-planted specimen is still just trying to survive the shock of being moved.
What to Plant During the Second Spring
September is the ideal time to plant almost any permanent landscape feature, with a few notable exceptions (wait until late winter for bare-root fruit trees and dormant roses).
1. California Natives This is the holy grail window for planting native species like Ceanothus, Manzanita, Toyon, and native Salvias. Because these plants despise summer irrigation once established, planting them in the fall allows them to settle in using natural winter rains, perfectly mimicking their evolutionary life cycle.
2. Structural Evergreens and Hedges If you are planning to install a privacy screen of Podocarpus, Laurel, or Boxwood, doing it now ensures the hedge will be pushing strong, unified growth by next summer.
3. Drought-Tolerant Mediterranean Shrubs Rosemary, Lavender, Rock Rose, and ornamental grasses all benefit massively from fall root establishment. They will enter next summer’s heatwave deeply anchored and highly resilient.
The Rules of Fall Planting
While fall is the best time to plant, you still have to do it correctly.
-
Dig Wide, Not Deep: Dig your planting hole two to three times as wide as the nursery pot, but exactly the same depth. If you dig too deep, the plant will sink over the winter, burying the crown in wet soil and inviting crown rot.
-
Skip the Heavy Amendments: Especially when planting natives or Mediterranean plants, avoid filling the hole with rich, loamy compost. Plants need to learn to survive in your native site soil. If you create a “teacup” of rich potting soil surrounded by dense clay, the roots will never leave the hole, and the plant will eventually drown.
-
Water Deeply: Even though the weather is cooling down, newly planted specimens still require deep, soaking irrigation for their first few weeks in the ground until the winter rains take over.
Ready to take advantage of the Second Spring? The design and installation teams at DK Landscaping are actively booking fall landscape renovations across Sonoma, Napa, and Marin counties. Let us help you select and install the perfect plants for a thriving, drought-resilient property. Contact us today to schedule your consultation!
Selecting Heat-Tolerant Plants for Sonoma and Napa Summers
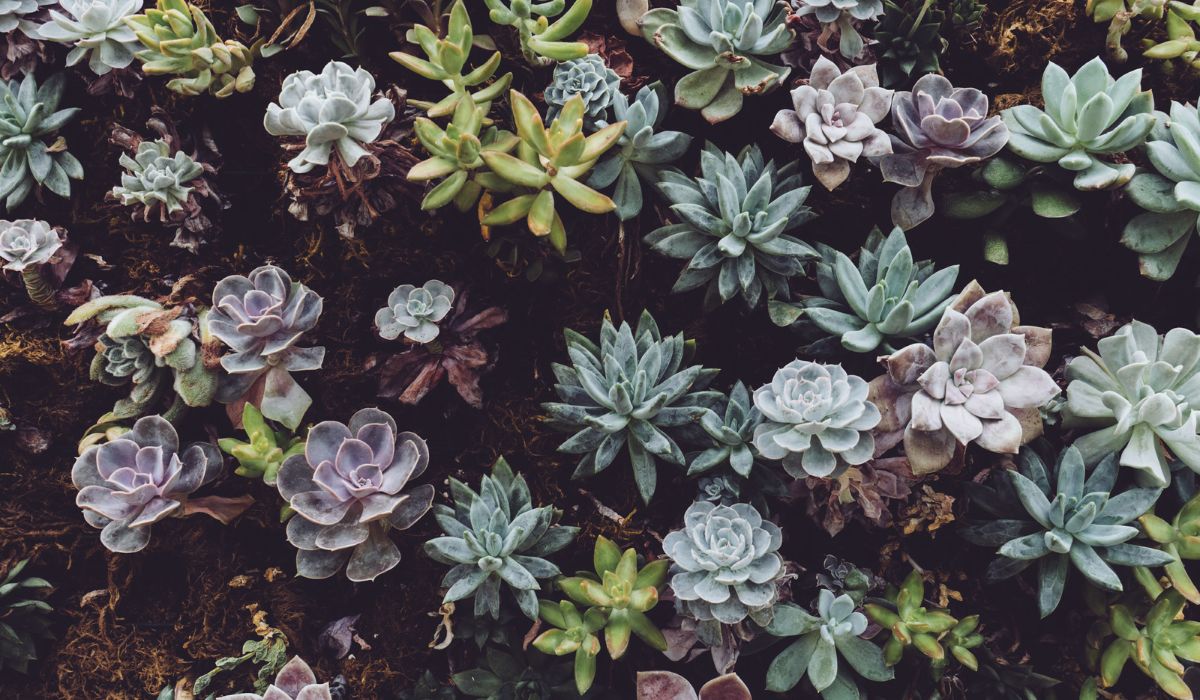
If you have spent any time walking through your garden in mid-July, you have likely noticed a clear divide. Some plants—like traditional hydrangeas, hostas, and thirsty turfgrass—look exhausted, scorched, and utterly miserable despite your best watering efforts. Meanwhile, other plants in the exact same yard look vibrant, structural, and completely unbothered by the 95-degree heat.
The secret to a landscape that looks incredible in July and August isn’t spending hours with a garden hose; it is choosing the right genetic material from the start. If you are tired of fighting the climate and replacing scorched plants every fall, it is time to transition your Sonoma or Napa County property toward heat-tolerant, drought-resistant species.
The Mediterranean Climate Advantage
We live in one of the few true Mediterranean climates on the planet. This means our region experiences cool, wet winters and long, hot, entirely dry summers. The smartest landscaping strategy is to select plants that have naturally evolved in similar climates around the world—places like the Mediterranean Basin, South Africa, parts of Australia, and central Chile.
These plants have developed incredible natural defenses against intense UV rays and prolonged drought. They feature waxy leaves to seal in moisture, silver foliage to reflect sunlight, and deep taproots to mine for subterranean water.
While July is generally too hot to plant new specimens (it is best to wait for the “Second Spring” of September and October to put new roots in the ground), right now is the absolute best time to observe your yard, see what is failing, and plan your heat-tolerant replacements.
Top Heat-Tolerant Superstars for Northern California
Here is a curated list of spectacular, high-performing plants that thrive when the heat peaks in Northern California.
1. Aromatic Mediterranean Shrubs These plants offer year-round structure, require very little water once established, and release intoxicating fragrances when the sun hits their foliage.
-
Lavender (Lavandula): Both English and Spanish varieties are bomb-proof in our climate. They love baking sun, despise wet feet, and provide brilliant purple blooms that pollinators adore.
-
Rosemary (Salvia rosmarinus): Whether you choose an upright architectural variety (like ‘Tuscan Blue’) or a cascading groundcover (like ‘Prostratus’), rosemary provides dark, evergreen structure and requires virtually zero summer irrigation.
-
Rock Rose (Cistus): A rugged, evergreen shrub that produces tissue-paper-like flowers in pinks and whites. It actively thrives in poor, rocky soil and intense heat.
2. Succulents and Structural Accents Succulents store their own water reservoirs in their fleshy leaves and stems, making them the ultimate drought defenders.
-
Agave and Aloe: These provide massive architectural impact. Their striking, rigid rosettes serve as modern focal points in a garden bed, creating stunning contrast when paired with softer, flowing plants.
-
Sedums and Sempervivums: Perfect for rock gardens, border edges, or shallow containers that bake in the afternoon sun. They provide rich textures and colors ranging from lime green to deep burgundy.
3. Movement and Texture: Ornamental Grasses Ornamental grasses catch the evening summer breezes, adding life, movement, and a soft auditory rustle to the landscape.
-
Blue Oat Grass (Helictotrichon sempervirens): Forms a perfect, spiky dome of icy blue foliage that looks incredible when planted in sweeping drifts.
-
Mexican Feather Grass (Nassella tenuissima): Creates a soft, rolling, golden aesthetic that glows beautifully in the late afternoon summer sun. (Be sure to check local invasiveness guidelines, or substitute with native Deergrass, Muhlenbergia rigens).
4. Colorful Summer Perennials You don’t have to sacrifice color to save water. These perennials hit their blooming stride right when the heat is at its worst.
-
Yarrow (Achillea): A California native that produces flat, umbrella-like clusters of flowers in yellows, pinks, and reds. It loves the heat and is highly resistant to deer.
-
Russian Sage (Perovskia atriplicifolia): Features silvery foliage and clouds of lavender-blue flowers. It thrives in the hottest, driest spots of your yard and requires almost no maintenance.
-
Lantana: A low-growing, spreading perennial that blooms non-stop from spring until the first frost, offering clusters of vibrant orange, yellow, and magenta flowers.
Planning Your Landscape Renovation
If your July garden is leaving you frustrated, don’t rush to the nursery just yet. Take notes, take photos of the empty or struggling spots in your yard, and start building your plant list now. By the time the cooler planting window of autumn arrives, you will have a comprehensive plan to transform your thirsty, struggling yard into a resilient, heat-loving oasis.
Ready to rethink your landscape? The design team at DK Landscaping specializes in breathtaking, drought-tolerant environments tailored to the Sonoma, Napa, and Marin climates. Contact us today to start planning your fall renovation!
Mid-Summer Drought Defense: Deep-Root Watering and Heat Mitigation

July marks the arrival of peak summer in Northern California. Across Sonoma, Napa, and Marin counties, the fog burns off early, the skies remain a cloudless, brilliant blue, and daytime temperatures routinely soar into the 90s—and often cross the 100-degree threshold. With months having passed since our last meaningful rainfall, the landscape is entirely dependent on your management to survive the intense, baking heat.
During these mid-summer months, water conservation is not just a suggestion; it is a permanent regional necessity. The challenge for homeowners is keeping their lawns lush, their trees healthy, and their flower beds vibrant without letting their water bills skyrocket.
The secret to maintaining a beautiful summer landscape while remaining environmentally and economically responsible lies in mastering two critical practices: deep-root watering and proactive heat mitigation.
Understanding Plant Heat Stress
Before adjusting your sprinklers, it is important to understand what happens to a plant during a July heatwave. When temperatures spike, plants lose moisture through their leaves in a process called transpiration—essentially, plant sweating. If a plant transpires water faster than its roots can pull replacement moisture from the soil, the plant loses turgor pressure. The leaves wilt, the edges turn brown and crispy, and the plant stops growing to conserve energy.
If a homeowner sees a wilting plant at 2:00 PM on a 95-degree day, the panic response is usually to grab the garden hose and spray the foliage. This is a massive mistake. Wilting in the mid-afternoon is often a natural defense mechanism to reduce surface area exposed to the sun. Spraying the leaves with water during peak heat acts like a magnifying glass, burning the foliage, and the water evaporates before it ever reaches the roots.
The Magic of Deep-Root Watering
The most common irrigation mistake homeowners make in July is watering their landscape for 5 or 10 minutes every single day. Frequent, shallow watering teaches plant roots to stay in the top inch of the soil, right where the sun’s heat is most intense and evaporation is highest.
To build a drought-resilient garden, you must train your plants’ roots to dive deep underground where the soil remains cool and moist long after the surface has dried out. This is achieved through Deep-Root Watering.
-
Water Less Often, But for Longer: Instead of watering a shrub for 10 minutes every day, water it for 45 minutes twice a week. This allows the moisture to penetrate 12 to 18 inches down into the soil profile.
-
The “Cycle and Soak” Method: Northern California’s heavy clay soils absorb water very slowly. If you run a sprinkler for 30 straight minutes, the water will likely pool and run off into the street after 10 minutes. Program your smart controller to run for 10 minutes, pause for 30 minutes to let the water soak in, and then run for another 10 minutes. This pushes the water deep into the root zone without wasting a drop to surface runoff.
Embracing Drip Irrigation
If you are still watering your garden beds with overhead pop-up sprays, July is the time to evaluate a conversion. Overhead sprays throw water into the air, where up to 30% of it is immediately lost to wind drift and evaporation on a hot summer afternoon.
Drip irrigation delivers water directly to the base of the plant, seeping slowly into the root zone with virtually zero evaporation. Upgrading your shrub beds and vegetable gardens to point-source drip emitters or inline drip grids will drastically cut your water usage while actually improving the health of your plants.
Timing is Everything: When to Water
In July, when you water is just as important as how much you water.
-
The Golden Hour (Pre-Dawn): The absolute best time to run your irrigation is between 3:00 AM and 6:00 AM. The air is cool, the winds are calm, and the water has time to soak deeply into the soil before the sun comes up to bake it away.
-
Avoid Evening Watering: Watering at 8:00 PM might seem logical, but leaving foliage wet overnight in the warm summer air creates the perfect breeding ground for powdery mildew and fungal infections.
Stop Fertilizing During Heatwaves
Finally, put the fertilizer away. Pushing a plant to generate new, tender leafy growth during a 100-degree heatwave places immense physiological stress on the plant. Allow your landscape to coast through the hottest weeks of July; you can resume feeding when the weather begins to cool in late September.
Are you struggling to keep your yard green without wasting water? The irrigation experts at DK Landscaping specialize in smart controller programming, drip conversions, and water-wise property management. Contact us today to optimize your summer watering schedule!
Mulch Matters: Retaining Moisture as Summer Temperatures Climb

As the vibrant spring season transitions into May, residents of Sonoma, Napa, and Marin counties know exactly what is on the horizon: the long, dry, unforgiving heat of a Northern California summer. From June through October, we can expect virtually zero rainfall, meaning every drop of moisture your plants receive must come from your irrigation system.
With water conservation remaining a permanent way of life in our region, homeowners are constantly looking for ways to lower their utility bills without sacrificing the beauty of their landscapes. While upgrading to a smart irrigation controller and planting drought-tolerant natives are excellent strategies, there is one foundational landscaping practice that outshines them all when it comes to preserving water: Mulching.
Applying a thick, high-quality layer of mulch across your garden beds in May is the single most effective, cost-efficient, and immediate action you can take to prepare your property for the coming summer heat.
How Mulch Acts as a Defensive Shield
If you leave the soil in your garden beds bare and exposed to the intense May sun, you are fighting a losing battle. The sun beats down directly on the topsoil, baking it into a hard, cracked crust. When the soil bakes, the moisture drawn from your irrigation system evaporates into the atmosphere almost instantly, before it ever has a chance to sink deep into the root zones of your plants.
A proper layer of organic mulch acts as a powerful defensive shield between the sky and the soil.
-
Drastic Moisture Retention: A 3-inch layer of mulch acts like a physical lid, blocking the sun’s rays and significantly slowing the rate of surface evaporation. Studies show that properly mulched gardens can reduce their overall water requirements by up to 50% during the peak of summer.
-
Temperature Regulation: Bare soil absorbs solar radiation, meaning the root zones of your plants can easily reach 90 or 100 degrees during a heatwave. This causes immense physiological stress to the plant. Mulch acts as a thermal blanket, keeping the subterranean root zone 10 to 20 degrees cooler than the ambient air temperature.
-
Weed Suppression: Weeds are aggressive competitors that steal vital water and nutrients away from your prized plants. A thick layer of mulch blocks the sunlight that dormant weed seeds require to germinate, stopping the problem before it ever breaks the surface.
Choosing the Right Mulch for the Job
Not all mulches are created equal, and choosing the wrong type can actually harm your landscape. You should always opt for organic, wood-based mulches rather than inorganic options like rubber chips or gravel (unless you are designing a specific desert succulent garden). Organic mulches break down slowly over time, feeding the soil microbiome and improving the soil structure year after year.
-
Arborist Wood Chips: This is the gold standard for landscape health. A mixture of varying sizes of wood, bark, and leaves locks together tightly, resisting wind erosion while allowing water to penetrate easily.
-
Shredded Bark (Gorilla Hair): This fibrous, finely shredded redwood or cedar bark looks beautiful and clings exceptionally well to steep hillsides and slopes where heavier chips might wash away. However, it can sometimes mat down too tightly, repelling water if it isn’t fluffed occasionally.
-
Compost: While compost is technically a soil amendment rather than a true mulch, laying an inch of high-quality compost underneath your wood chips is a brilliant way to feed the soil biology while utilizing the wood chips to retain the moisture.
Note on dyed mulches: Avoid cheap, artificially dyed black or red wood mulches. These are often made from recycled construction debris and pallets, which can leach unwanted chemicals and heavy metals into your garden soil as they degrade.
The Golden Rules of Application
Applying mulch is labor-intensive, but applying it incorrectly can be disastrous. To get the maximum benefit in May, follow these professional guidelines:
-
The Rule of Threes: For ornamental flower beds and around shrubs, aim for a consistent depth of 2 to 3 inches. Any less, and the sun will penetrate it; any more, and you risk suffocating the soil, preventing oxygen from reaching the roots.
-
Avoid the “Volcano”: The most common and destructive landscaping mistake is piling mulch high up against the trunks of trees and the bases of shrubs. This is known as “volcano mulching.” The thick, moist mulch piled against the bark traps moisture against the wood, inevitably leading to crown rot, fungal infections, and providing a perfect hiding spot for boring insects. Always pull the mulch back 3 to 4 inches away from the direct base of every plant, creating a small, clear “donut” around the trunk.
-
Water Before and After: Before laying down fresh mulch in May, ensure the soil beneath is deeply watered. Once the mulch is spread, water it lightly again to help it settle into place and lock together.
Spreading yards of heavy mulch in the spring sun is backbreaking work. Let the professional crews at DK Landscaping handle the heavy lifting. We deliver and install premium, soil-enriching mulches across Sonoma, Napa, and Marin counties. Contact us today to schedule your spring application!
Natural Pest Control: Protecting Your Landscape Without Harsh Chemicals

As the heavy rains of early spring taper off and the warm, sunny days of May take hold across Sonoma, Napa, and Marin counties, your landscape responds with an explosion of rapid, tender new growth. Unfortunately, this fresh foliage serves as an all-you-can-eat buffet for the region’s most aggressive insect populations.
When homeowners see their prized roses covered in aphids or their vegetable leaves chewed to ribbons by caterpillars, the immediate reaction is often a trip to the hardware store for a powerful, broad-spectrum chemical insecticide. However, spraying toxic chemicals across your property is not just harmful to the environment; it is actually a flawed landscaping strategy that guarantees worse pest problems in the future.
The secret to a resilient, thriving garden lies in abandoning the “spray-and-pray” method and embracing a sustainable, natural approach known as Integrated Pest Management (IPM).
The Danger of Broad-Spectrum Chemicals
Before discussing natural solutions, it is vital to understand why conventional chemical sprays are so damaging to your landscape’s long-term health. Broad-spectrum insecticides are indiscriminate killers. When you spray them to eliminate an aphid infestation, you are simultaneously poisoning the ladybugs, lacewings, parasitic wasps, and pollinating bees that happen to be in your yard.
Because pest insects (like aphids and spider mites) reproduce at a vastly faster rate than predatory insects (like ladybugs), the pests will rebound in a matter of days. But now, because you have killed off all their natural predators with the chemical spray, the new pest population will explode entirely unchecked, forcing you into an endless, expensive cycle of chemical reliance.
Step 1: The Foundation of Prevention (Cultural Control)
The absolute best pest control strategy is a healthy plant. In nature, insects specifically target weak, stressed, and dying plants; they rarely attack a robust, thriving specimen. Your first line of defense is ensuring your plants have exactly what they need:
-
Right Plant, Right Place: A shade-loving fern planted in baking afternoon sun will always be stressed and prone to scale or mites. Ensure your plants match their microclimates.
-
Proper Watering: Overwatering suffocates roots and invites fungal gnats and root rot, while underwatering causes physiological stress that attracts boring insects.
-
Fertilize Responsibly: Pushing too much high-nitrogen chemical fertilizer forces the plant to produce massive amounts of weak, sappy, incredibly tender foliage—the exact type of growth that aphids find irresistible. Stick to slow-release organic composts.
Step 2: Mechanical Interventions
When pests do appear in May, your next step should involve physical removal rather than chemical intervention.
-
The Hose Blast: Aphids, whiteflies, and spider mites are incredibly soft-bodied and weak. A sharp, targeted blast of water from your garden hose early in the morning will physically knock them off the plant, breaking their mouthparts and preventing them from climbing back up.
-
Hand-Picking: For larger pests like tomato hornworms, cabbage loopers, or slugs, put on a pair of garden gloves and pick them off by hand, dropping them into a bucket of soapy water.
-
Physical Barriers: Use floating row covers over your vegetable beds to physically block moths from laying eggs on your crops, and wrap copper tape around the base of vulnerable hostas and potted plants to repel slugs and snails.
Step 3: Enlisting the Beneficial Army (Biological Control)
Your garden should function as a balanced ecosystem, which means you need to actively recruit an army of predatory insects to do the pest control for you.
-
Attract the Good Guys: You can invite predatory insects by planting specific nectar-rich, umbrella-shaped flowers that they rely on for energy. Plant dill, fennel, yarrow, sweet alyssum, and cilantro in and around your vulnerable garden beds to create a hospitable environment for ladybugs, hoverflies, and lacewings.
-
Be Patient: When an aphid outbreak occurs, resist the urge to panic. It often takes a week or two for the predatory insects to discover the food source and move in to handle the infestation.
Step 4: Targeted Organic Interventions
If a pest population is truly threatening the life of a valuable plant and mechanical controls aren’t enough, it is time for targeted, organic treatments. These products break down rapidly in the environment and do not leave long-lasting toxic residues.
-
Insecticidal Soaps: These specially formulated fatty-acid soaps break down the protective waxy coating on soft-bodied insects, causing them to dehydrate. They must be sprayed directly onto the insect to work.
-
Neem Oil: Extracted from the seeds of the neem tree, this oil disrupts the hormonal life cycle of pests, preventing them from feeding or molting.
-
Application Timing is Everything: Even organic sprays can harm beneficial insects if applied incorrectly. Always apply neem oil or insecticidal soaps late in the evening, long after the bees and butterflies have finished foraging for the day.
Keeping your landscape vibrant, healthy, and pest-free requires a deep understanding of local ecology. Let DK Landscaping manage your property with our sustainable, eco-friendly maintenance programs. Contact us today for a consultation!
Native Brilliance: Designing a Low-Water, High-Impact Spring Oasis
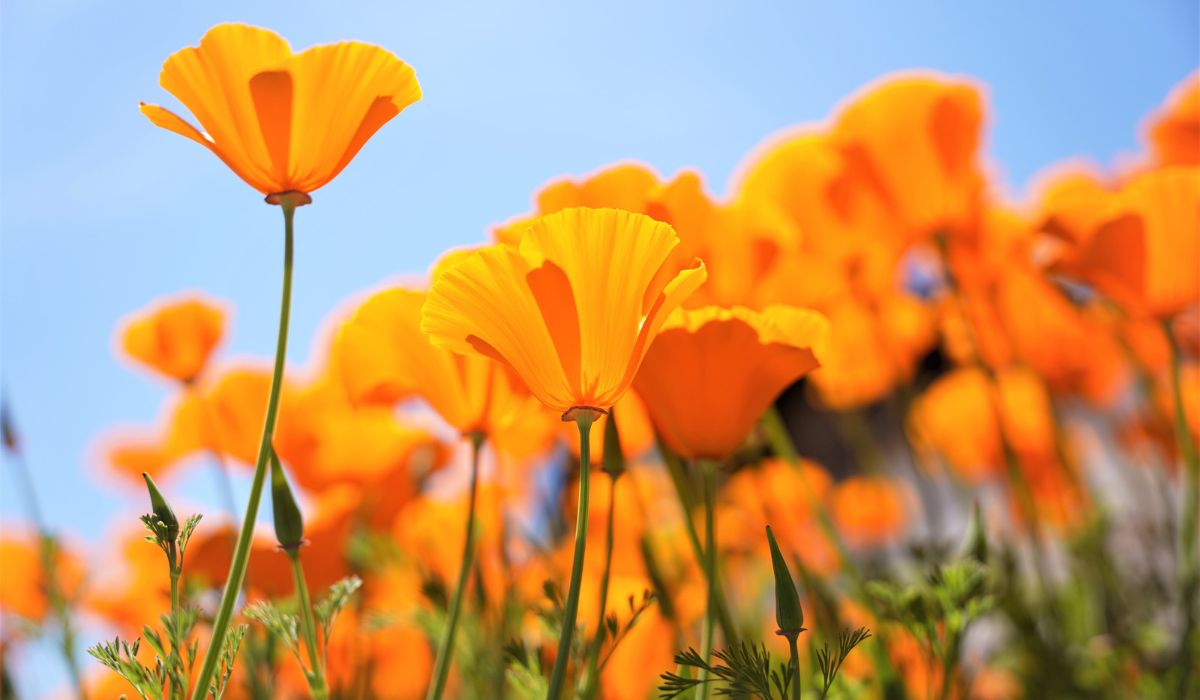
April is the undisputed peak of flower season in Northern California. As the hillsides of Sonoma, Napa, and Marin counties turn vibrantly green and erupt with wildflowers, homeowners often look at their own properties and wonder how to capture that same breathtaking, effortless beauty. The secret does not lie in planting thirsty, exotic ornamentals that require endless maintenance and massive water bills. The true secret to a spectacular spring landscape lies in embracing the unparalleled brilliance of California native plants.
Designing a low-water, high-impact landscape using native species is no longer just an eco-conscious trend; it is the absolute gold standard for modern landscaping in our region. When you design with natives, you are working with our Mediterranean climate rather than fighting against it.
The Evolutionary Advantage of California Natives
Before you start ripping out your lawn, it is crucial to understand why native plants perform so spectacularly well here. California native plants have spent thousands of years evolving alongside our highly specific regional conditions: heavy, wet winters followed by long, baking, entirely rainless summers.
Because of this evolutionary history, natives possess incredible adaptations. Many feature deep taproots to seek out subterranean moisture, waxy or silver-hairy foliage to reflect intense UV rays, and the ability to go into a state of semi-dormancy during the hottest months to conserve energy. When you plant exotics from temperate climates (like hydrangeas or hostas), you have to artificially recreate their native environment using massive amounts of tap water, rich fertilizers, and chemical interventions. Native plants, once established, require almost none of that.
Top Native Showstoppers for Northern California
Designing a high-impact spring oasis requires selecting plants that offer structural beauty, vibrant color, and contrasting textures. Here are some of the absolute best performers for our region:
1. Ceanothus (California Lilac) If you want a show-stopping explosion of color in April, Ceanothus is unmatched. Depending on the variety, this evergreen shrub erupts into massive clusters of electric blue, indigo, or crisp white flowers. It is incredibly drought-tolerant, grows rapidly, and serves as an excellent privacy screen or structural anchor for your garden beds.
2. Arctostaphylos (Manzanita) Manzanita provides year-round architectural interest thanks to its striking, smooth, mahogany-red bark and twisting, sculptural branches. In late winter and early spring, it produces delicate, urn-shaped pink or white flowers. It demands excellent drainage and despises summer water once established, making it the ultimate low-maintenance focal point.
3. California Poppy (Eschscholzia californica) No native garden is complete without our state flower. These vibrant orange and gold blooms provide an incredibly cheerful groundcover. They reseed themselves freely, thrive in poor, rocky soil, and require absolutely zero supplemental fertilization.
4. Native Salvias (Sage) Cleveland Sage (Salvia clevelandii) and Hummingbird Sage (Salvia spathacea) are essential for introducing intense, intoxicating fragrances to your yard. They produce whorls of purple and magenta flowers that bloom profusely through spring and early summer, thriving in full sun and fast-draining soils.
Designing for High Visual Impact
A common misconception is that native gardens look wild, unruly, or “weedy.” In reality, a professionally designed native landscape can be just as sleek, structured, and modern as any formal garden. The key is in the design principles:
-
Embrace Mass Planting: Rather than planting one of everything, plant natives in large, sweeping drifts of 5 to 7 identical plants. A massive drift of purple Salvias contrasting against a drift of silver-foliage California fescue creates a striking, modern aesthetic.
-
Layering Heights: Design your beds with a clear foreground, middle ground, and background. Use creeping groundcovers (like native trailing blackberries or low-growing Ceanothus) in the front, flowering perennials in the middle, and tall structural evergreens (like Toyon or Western Redbud) in the back.
-
Contrast Textures: Pair fine, feathery ornamental grasses (like Deergrass) with the broad, leathery leaves of a flannel bush or the rigid, architectural spikes of a native agave to create visual tension and interest.
The Truth About Native Plant Maintenance
While native gardens are low-water and low-chemical, they are not “no maintenance.” The most critical phase of a native garden is its first year.
-
The Establishment Phase: Native plants must be watered deeply and regularly during their first 12 to 18 months in the ground to establish their deep root systems. Only after this establishment period can you dial back the irrigation to a trickle.
-
Avoid the Compost Trap: Do not amend native planting holes with rich compost or chemical fertilizers. Our natives evolved to thrive in lean, mineral-rich soils. Fertilizing them will actually cause them to grow too quickly, become leggy, and die prematurely.
-
Strategic Pruning: Many natives dislike hard pruning. Instead of shearing them into rigid boxes, selectively thin out dead wood to maintain their natural, organic shapes.
Ready to swap your thirsty lawn for a gorgeous, drought-tolerant native garden? The landscape design team at DK Landscaping specializes in breathtaking, water-wise environments. Contact us today to bring your vision to life!
Spring Awakening: Waking Up Your Lawn and Irrigation Systems

As the heavy winter rains subside and the days begin to lengthen across Sonoma, Napa, and Marin counties, your landscape is receiving the biological signal to wake up. March is a season of explosive growth. However, transitioning from winter dormancy to active spring growth requires more than just waiting for the sun to shine. A successful spring season demands a proactive strategy, specifically when it comes to reviving your turfgrass and recommissioning your irrigation system.
If you wait until the heat of late spring to address lawn issues or fix broken sprinkler heads, you will find yourself constantly playing catch-up. By taking deliberate, comprehensive action in March, you set the foundation for a lush, resilient, and water-efficient landscape that will thrive straight through the scorching heat of a Northern California summer.
Part 1: Waking Up Your Lawn After a Long Winter
Your lawn has spent the last several months surviving cold morning frosts, heavy atmospheric rivers, and low light conditions. Now that soil temperatures are slowly beginning to rise, it is time to shift your turf from survival mode into growth mode.
1. Assessing and Raking for Winter Damage Before applying any products or turning on the water, take a walk across your property. Look for signs of winter stress. Heavy rains often leave behind compacted areas, washouts, or layers of matted, dead grass known as thatch. Use a sturdy landscaping rake to vigorously comb through the grass. This process, called dethatching, lifts the matted blades, removes organic debris, and allows vital sunlight and oxygen to reach the soil surface where new shoots are trying to emerge.
2. Core Aeration: Relieving Compaction Northern California soils are notoriously heavy in clay. After months of pounding winter rain, that clay becomes tightly compacted, acting more like concrete than soil. When soil is compacted, grass roots cannot breathe, expand, or absorb water efficiently. Core aeration is the process of mechanically removing small plugs of soil from the lawn. This instantly relieves compaction, creating thousands of tiny channels that allow oxygen, water, and fertilizer to penetrate deep into the root zone. Aerating in March guarantees that your spring fertilizers actually reach the roots rather than simply washing away across the hard soil surface.
3. Overseeding and Topdressing Bare Patches If winter left your lawn looking patchy or thin, March is an excellent window for overseeding. Choose a high-quality, drought-tolerant seed blend suitable for our Mediterranean climate, such as a turf-type tall fescue.
-
Break up the soil surface in the bare patches.
-
Spread your seed evenly.
-
Cover the seed with a thin, quarter-inch layer of high-quality compost or topsoil (topdressing) to protect it from hungry birds and to retain moisture during germination.
4. Spring Fertilization and Weed Control Turfgrass wakes up hungry. Applying a balanced, slow-release spring fertilizer provides the essential nitrogen your lawn needs to push out thick, green blades, alongside the phosphorus and potassium required for deep root development. Simultaneously, March is your final window to apply a pre-emergent herbicide. Pre-emergents create a microscopic barrier in the topsoil that stops aggressive summer weeds—like crabgrass and spurge—from germinating. Timing is critical; once the soil temperature consistently hits 55 degrees, weed seeds will sprout, and pre-emergents will no longer be effective.
Part 2: Revitalizing and Tuning Your Irrigation System
The single biggest mistake homeowners make in the spring is blindly switching their irrigation controller from “Off” to “Run.” Winter weather, freezing temperatures, and shifting soils can easily damage underground pipes, delicate drip emitters, and sprinkler heads. Recommissioning your system requires a careful, step-by-step inspection to prevent massive water waste and landscape flooding.
1. The Gentle System Flush Before testing individual zones, you must flush the main lines. Dirt, sediment, and mineral scale often settle in the pipes during winter dormancy. Remove the nozzle from the last sprinkler head on each zone and turn the water on manually for a few minutes. This flushes out accumulated debris that would otherwise instantly clog your micro-sprays and drip emitters.
2. Inspecting and Adjusting Sprinkler Heads Once the system is flushed, run each zone one by one and walk the property to inspect the operation.
-
Look for Geysers: A massive spray of water indicates a missing or completely broken nozzle.
-
Check for Weeping Valves: If water continues to leak from the lowest head on a zone long after the system shuts off, you likely have a failing valve diaphragm that needs replacement.
-
Adjust Arcs and Trajectories: Sprinkler heads often get bumped by lawnmowers or shift as the soil freezes and thaws. Use an adjustment tool to ensure heads are spraying the landscape, not the sidewalk, driveway, or side of your house.
3. Deep Cleaning the Drip Lines Drip irrigation is highly efficient, but it is also highly susceptible to winter damage. Rodents looking for water often chew through the soft poly tubing. Inspect your garden beds for unexpected puddles or hissing sounds that indicate a blowout. Additionally, unscrew and clean the main filter located near your irrigation valves to ensure optimal water pressure reaches your plants.
4. Calibrating the Smart Controller Finally, program your smart controller for spring—not summer. March weather is volatile; you may have a sunny 75-degree day followed by a week of rain. Set your watering durations to be shorter and less frequent than your summer schedule. Ensure your rain sensor is clean, functioning, and communicating correctly with your controller so your system automatically shuts down during spring showers.
Does this sound like a lot to manage on a weekend? The experts at DK Landscaping specialize in comprehensive spring clean-ups, core aeration, and professional irrigation auditing. Let us prepare your property for its best season yet. Contact us today for a consultation!
Early Spring Weed Prevention: Stopping Invasive Growth Before It Starts
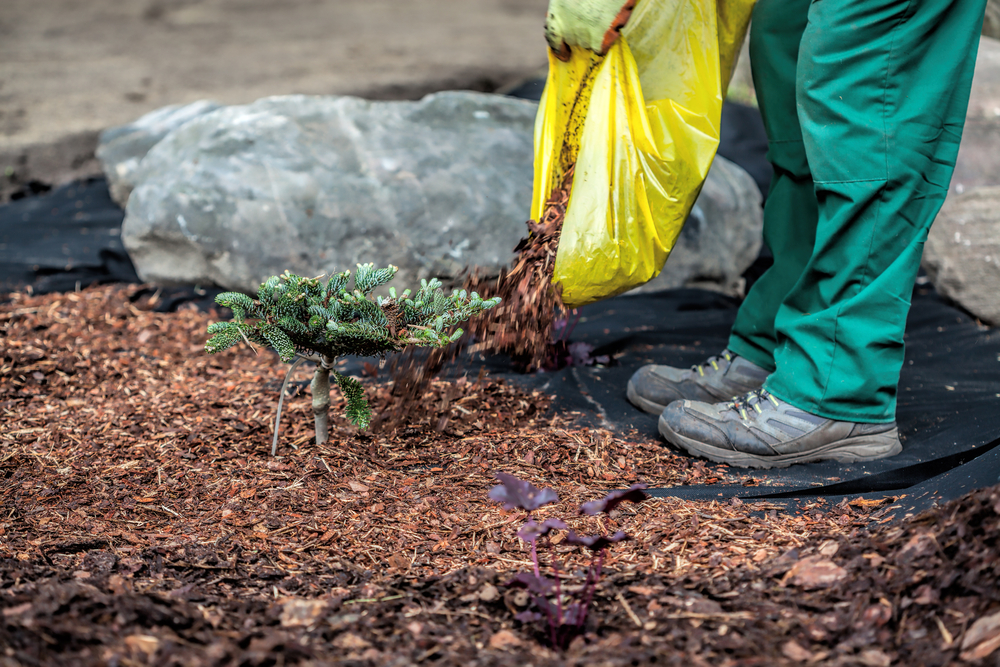
Weeds are resilient survivors, and in Northern California’s Mediterranean climate, invasive annual weeds begin germinating aggressively in late winter as soil temperatures tick upward. Waiting until spring to deal with a blanket of weeds means fighting an uphill battle. Intercepting them in February with a proactive prevention strategy saves you hours of grueling manual labor later in the season.
Apply Targeted Pre-Emergents
If broadleaf weeds and aggressive annual grasses like crabgrass take over your property every spring, February is your critical strike window.
-
Applying an organic or professionally targeted pre-emergent herbicide creates a microscopic barrier in the top layer of soil.
-
This barrier safely stops weed seeds from germinating without harming your established perennials, ornamental grasses, or dormant shrubs.
Thicken Mulch Barriers
A thin mulch layer is an open invitation for wind-blown weed seeds to take root. Walk your property in February and top off any bare or thinning spots in your flower beds with a fresh 2-to-3-inch layer of organic mulch. This extra depth blocks vital sunlight from reaching hidden weed seeds, effectively stopping them in their tracks before they ever break the surface.
Hand-Pull Early Invaders
Winter rains soften clay soils significantly, making February the easiest time of the year to pull deep-rooted taproot weeds like dandelions, wild mustard, and thistles. Grab them firmly at the base and pull steadily to extract the entire root system. Getting them out now prevents them from flowering and dropping thousands of new seeds across your landscape.
Get ahead of seasonal weeds and keep your property immaculate with comprehensive landscape maintenance from DK Landscaping. Get in touch with us today!


