

The Foundation of Flourishing Gardens: Understanding Soil Health
Welcome to another insightful post from DK Landscaping, where we dive into the essentials of creating and maintaining vibrant gardens. Today, we’re focusing on a critical, yet often overlooked, aspect of landscaping: soil health. Understanding and nurturing the soil is the first step towards a flourishing garden. Let’s explore why soil health is foundational and how you can enhance it for a thriving outdoor space.
The Vital Role of Healthy Soil
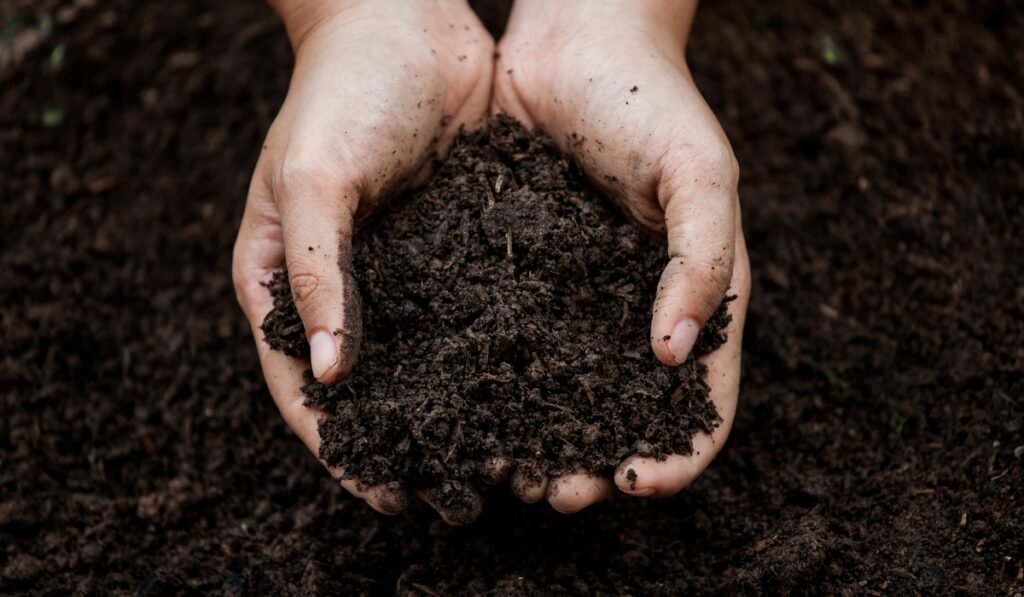
Soil is not just dirt. It’s a living, breathing entity that plays a crucial role in supporting plant life. Healthy soil fosters a rich ecosystem of bacteria, fungi, worms, and other organisms that work together to break down organic matter, enriching the soil and providing essential nutrients to plants.
Nutrient Availability and Soil Health
Plants rely on soil for water, oxygen, and nutrients. Healthy soil has the right balance of minerals and organic matter, which releases nutrients in a form that plants can absorb. Understanding the nutrient content of your soil is key to identifying which amendments might be needed to support your garden.
Water Retention and Drainage
The structure of healthy soil allows it to effectively retain moisture, providing plants with a consistent water supply. It also ensures proper drainage, preventing waterlogged roots which can lead to plant diseases. Balancing moisture retention with adequate drainage is a hallmark of soil health.
Enhancing Your Soil Health
Testing Your Soil
The first step in improving soil health is understanding its current condition. Soil tests reveal pH levels, nutrient deficiencies, and organic matter content, guiding your amendment choices.
Organic Matter and Composting
Adding organic matter is one of the best ways to enhance soil health. Compost improves soil structure, nutrient content, and microbial activity, supporting vibrant plant growth.
Mulching: A Dual Purpose Ally
Mulching conserves moisture, suppresses weeds, and as it decomposes, adds organic matter back into the soil, improving its health and fertility.
Natural Fertilizers and Amendments
Choosing the right fertilizers and soil amendments is crucial. Organic options like bone meal, blood meal, and green manure can provide necessary nutrients without harming soil organisms.
Embracing Crop Rotation and Cover Crops
In larger garden spaces, rotating crops and using cover crops can significantly improve soil health by preventing nutrient depletion and enhancing soil structure.
The Impact of Soil Health on Garden Success
Healthy soil is the bedrock of a flourishing garden. It supports plant health, aids in disease resistance, and contributes to the overall beauty and productivity of your landscaping efforts.
By investing time and resources into understanding and improving soil health, you’re laying the groundwork for a garden that not only grows but thrives.
At DK Landscaping, we believe that a deep understanding of soil health is essential for any successful landscaping project. By focusing on the foundation beneath our feet, we can create lush, vibrant gardens that are a testament to the power of healthy soil.
Remember, every great garden starts with great soil. Let’s make your garden flourish together.
Saving Water, Beautifying Spaces: Water-Efficient Landscaping Techniques
Welcome to the DK Landscaping blog, where we blend beauty with sustainability. In today’s post, we’re diving into the heart of water-efficient landscaping techniques that not only save precious water resources but also transform your outdoor spaces into stunning eco-friendly havens.
Embracing the Basics of Water Efficiency
Understanding Your Landscape’s Needs
Before we start, it’s crucial to understand the unique needs of your landscape. This means assessing soil type, sunlight, and the local climate. By understanding these elements, you can make informed choices that naturally reduce water usage.
The Role of Native Plants
Native plants are the cornerstone of water-efficient landscaping. They’re adapted to the local environment, requiring less water than non-native species. We’ll explore how to select and incorporate these into your design for a resilient and vibrant garden.
Innovative Irrigation Techniques
Drip Irrigation: A Closer Look
Drip irrigation is a game-changer for water efficiency. By delivering water directly to the roots of plants, it minimizes waste and maximizes growth. We’ll guide you through setting up a system that suits your landscape’s specific needs.
Timing is Everything: Smart Irrigation Controllers
Learn how integrating smart irrigation controllers can automate and optimize your watering schedule based on real-time weather conditions, saving water and boosting plant health.
Mulching and Soil Management
The Magic of Mulch
Mulch isn’t just for looks. It plays a pivotal role in retaining soil moisture, regulating temperature, and suppressing weeds. Discover the best types of mulch for your garden and how to apply them effectively.
Soil Amendment Strategies
Healthy soil equals healthy plants. We’ll share tips on improving soil structure and fertility, ensuring your garden thrives while reducing the need for supplemental watering.
Designing with Water Efficiency in Mind
Zoning Your Garden for Water Efficiency
Creating zones in your garden based on water needs can significantly reduce waste. We’ll help you design a layout that groups plants with similar watering requirements together, making your landscape both beautiful and water-wise.
The Beauty of Xeriscaping
Xeriscaping doesn’t mean sacrificing color or variety. Learn how to design a stunning, low-water landscape using drought-tolerant plants and creative design principles.
Beyond the Garden: Rainwater Harvesting
Catching Every Drop: The Basics of Rainwater Harvesting
Rainwater harvesting systems can supplement your water supply beautifully. From simple rain barrels to more sophisticated systems, we’ll show you how to capture and use rainwater effectively in your garden.
The Impact of Water-Efficient Landscaping
Environmental and Economic Benefits
Adopting water-efficient landscaping techniques isn’t just good for the planet—it can also reduce your water bill. We’ll discuss the broader benefits of making these changes, from supporting local ecosystems to contributing to global water conservation efforts.
At DK Landscaping, we believe in creating beautiful, sustainable landscapes that stand the test of time. We hope this guide inspires you to adopt water-efficient practices that make a difference in your garden and the world. Stay tuned for more tips and insights on eco-friendly landscaping. Contact us today if you need help with your landscaping!
Seasonal Landscaping: Tips for Maintaining Your Yard
Seasonal landscaping is a practice that involves designing and maintaining outdoor spaces to reflect the changing seasons. This type of landscaping can be used to create a visually appealing and functional outdoor space that is suitable for different seasons throughout the year. Seasonal landscaping involves the use of plants, flowers, and other outdoor features that are specific to each season.
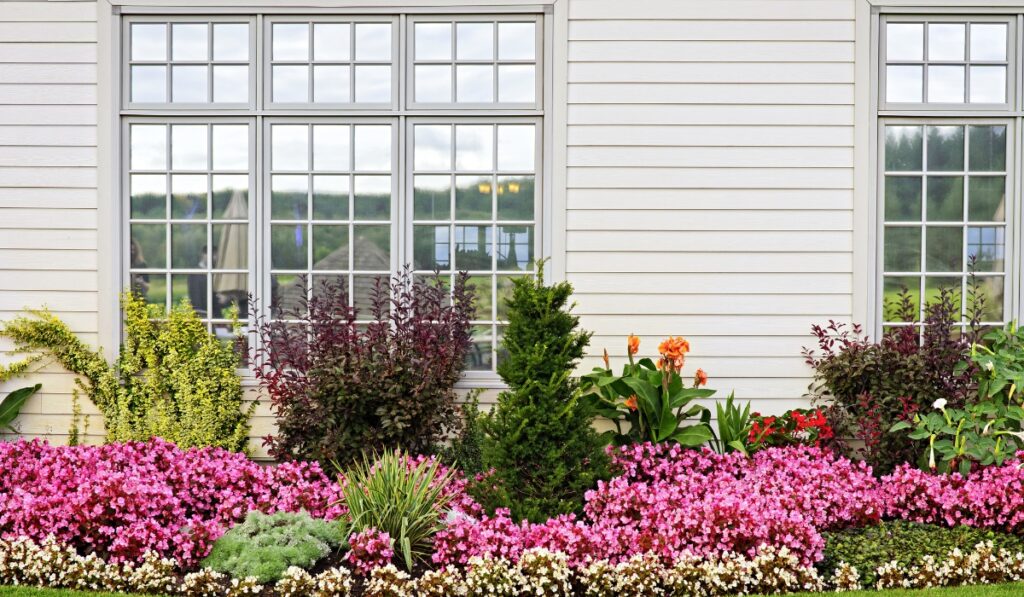
One of the main benefits of seasonal landscaping is that it can help to create a sense of continuity and connection between the indoors and outdoors. By incorporating seasonal elements into a landscape design, homeowners can create a seamless transition between their indoor and outdoor living spaces. This can help to create a more inviting and welcoming environment for guests, as well as a more enjoyable outdoor living experience for the homeowner.
Another benefit of seasonal landscaping is that it can help to increase the value of a property. A well-designed and maintained outdoor space can significantly enhance the curb appeal of a home, which can make it more attractive to potential buyers. Additionally, seasonal landscaping can help to create a unique and memorable outdoor space that sets a home apart from others in the area.
Understanding Seasonal Landscaping
Benefits of Seasonal Landscaping
Seasonal landscaping is an important aspect of maintaining a healthy and beautiful outdoor space. By changing the plants and design elements throughout the year, homeowners can ensure that their yard remains visually appealing and functional. Some benefits of seasonal landscaping include:
- Improved curb appeal: By changing the look of the yard throughout the year, homeowners can improve curb appeal and make their property stand out in the neighborhood.
- Increased property value: A well-maintained yard can increase the value of a property, and seasonal landscaping is an easy way to keep the yard looking its best.
- Enhanced outdoor living: By incorporating seasonal elements such as outdoor seating, lighting, and fire pits, homeowners can create an outdoor living space that can be enjoyed throughout the year.
Key Seasonal Changes
In order to create a successful seasonal landscape, it is important to understand the key changes that occur throughout the year. Some of the most important seasonal changes include:
- Spring: In the spring, homeowners should focus on planting new flowers and shrubs, and preparing the yard for the growing season. This is also a good time to clean up any debris that may have accumulated over the winter.
- Summer: During the summer, homeowners should focus on maintaining the yard and keeping it healthy. This may include watering, fertilizing, and mowing the lawn on a regular basis.
- Fall: In the fall, homeowners should prepare the yard for the winter months by raking leaves and removing any dead plants or debris. This is also a good time to plant bulbs and other plants that will bloom in the spring.
- Winter: During the winter, homeowners should focus on protecting their plants and yard from the cold weather. This may include covering plants, removing snow, and pruning trees and shrubs.
By understanding the key seasonal changes and benefits of seasonal landscaping, homeowners can create a beautiful and functional outdoor space that can be enjoyed throughout the year.
Planning Your Seasonal Landscaping
When it comes to landscaping, planning is crucial to ensure that your outdoor space looks beautiful all year round. This section will provide you with a guide on how to plan your seasonal landscaping, including tips on spring planning, summer upkeep, autumn transition, and winter preparation.
Spring Planning
Spring is the perfect time to start planning your seasonal landscaping. Begin by assessing your outdoor space and identifying any areas that need attention. Consider adding new plants, flowers, or shrubs to add color and texture to your garden. You may also want to consider adding new features such as a water fountain or a seating area.
It’s important to keep in mind the climate and soil type of your area when selecting plants. Make sure to choose plants that are suitable for your climate and soil type to ensure that they thrive. Also, consider the amount of sunlight your garden receives and choose plants accordingly.
Summer Upkeep
Summer is the time when your garden is in full bloom. It’s important to keep up with regular maintenance during this season to ensure that your garden stays healthy. This includes watering your plants regularly, removing weeds, and pruning any overgrown branches.
You may also want to consider adding mulch to your garden beds to help retain moisture and prevent weed growth. Additionally, consider adding a layer of fertilizer to promote healthy growth.
Autumn Transition
As the weather begins to cool down, it’s time to prepare your garden for the fall season. This includes removing any dead plants, leaves, and debris. You may also want to consider adding new plants that thrive in cooler temperatures such as mums or asters.
It’s also a good time to prepare your garden for the winter season by adding a layer of compost or mulch to protect your plants from the cold weather.
Winter Preparation
Winter can be harsh on your garden, so it’s important to prepare it for the colder months. This includes removing any dead plants, leaves, and debris. You may also want to consider covering your plants with burlap to protect them from frost and snow.
It’s also important to drain any water features and store outdoor furniture to protect them from the elements. Finally, consider adding some winter interest to your garden by adding evergreen plants or winter-blooming flowers.
By following these tips, you can ensure that your garden looks beautiful all year round. Happy landscaping!
Seasonal Planting Strategies
Selecting Plants for Each Season
When it comes to seasonal landscaping, selecting plants that are suitable for each season is crucial. Different plants thrive in different seasons, so it is important to choose those that will grow well during the time of year you want them to bloom.
For example, in the spring, you might consider planting bulbs such as tulips, daffodils, and hyacinths. These plants are perfect for adding color and vibrancy to your garden after a long, cold winter. In the summer, you might opt for flowering annuals, such as petunias, marigolds, and zinnias, which will add a burst of color to your garden beds.
In the fall, you might choose to plant mums, asters, or other autumn-blooming perennials. These plants will add warmth and depth to your garden as the temperatures begin to cool. And in the winter, you might consider planting evergreens, such as holly, spruce, or pine, which will provide a beautiful backdrop for your winter landscape.
Rotating Crops and Flowers
Another important strategy for seasonal landscaping is rotating crops and flowers. This involves planting different crops or flowers in the same location each year, which helps to prevent soil-borne diseases and pests from building up in the soil.
For example, if you planted tomatoes in a particular garden bed one year, you might choose to plant cucumbers or peppers in that same bed the following year. This will help to keep the soil healthy and productive, while also ensuring that your plants have the best chance of thriving.
By following these seasonal planting strategies, you can create a beautiful and thriving landscape that changes with the seasons. Whether you’re planting bulbs in the spring or evergreens in the winter, there’s always something new and exciting to look forward to in your garden.

Maintenance and Care
Soil Health and Fertilization
Maintaining healthy soil is crucial for the success of any landscaping project. Soil should be tested before any fertilization is applied to determine its nutrient content. Fertilizers should be chosen based on the soil’s needs and applied according to the manufacturer’s instructions. Organic fertilizers are a great option for those who want to avoid synthetic chemicals. Mulching can also help improve soil health by retaining moisture and adding organic matter.
Pruning and Weeding
Pruning and weeding are essential for maintaining the appearance and health of a landscaped area. Regular pruning helps to shape plants, remove dead or damaged branches, and promote healthy growth. Weeding helps to control the spread of unwanted plants and prevent competition for resources. It is important to use the proper tools and techniques when pruning to avoid damaging the plant.
Irrigation and Water Management
Proper irrigation and water management are critical for maintaining a healthy landscape. Overwatering can lead to root rot and other issues, while underwatering can cause plants to wilt and die. Watering should be done in the early morning or late evening to minimize evaporation. Drip irrigation systems are a great option for those who want to conserve water and minimize runoff. It is important to monitor soil moisture levels and adjust watering schedules accordingly.
Frequently Asked Questions
What are the best months to schedule landscaping services?
The best months to schedule landscaping services depend on the type of service needed. For planting, the ideal time is usually during the spring or fall seasons when the temperatures are mild. For lawn care, the best time is during the summer months when the grass is actively growing. It is recommended to consult with a professional landscaper to determine the best time for specific services.
How can I maintain my landscape throughout the year?
Maintaining a landscape throughout the year requires regular care and attention. This includes watering, fertilizing, pruning, and weeding. It is also important to monitor the health of plants and address any issues promptly. A professional landscaper can provide guidance on the specific care requirements for different types of plants and landscapes.
What are cost-effective strategies for beautiful landscaping?
Some cost-effective strategies for beautiful landscaping include using native plants, incorporating mulch to retain moisture and suppress weeds, and using low-maintenance plants. It is also important to plan and design the landscape carefully to ensure that it is functional and visually appealing.
How should I prepare my garden for the spring season?
Preparing a garden for the spring season involves cleaning up the landscape, removing any dead or damaged plants, and preparing the soil for planting. It is also important to fertilize and prune plants as needed. A professional landscaper can provide guidance on the specific steps needed to prepare a garden for the spring season.
What is included in a typical landscape maintenance checklist?
A typical landscape maintenance checklist includes tasks such as mowing the lawn, trimming shrubs and trees, fertilizing, watering, and weeding. It may also include tasks such as pest control, pruning, and mulching. A professional landscaper can provide a customized maintenance checklist based on the specific needs of the landscape.
What steps are necessary to winterize my landscaping?
Winterizing a landscape involves preparing plants and trees for the colder temperatures. This includes trimming back any dead or damaged branches, wrapping delicate plants with burlap or other protective material, and applying a layer of mulch to protect the soil. It is also important to turn off and drain any outdoor water features to prevent damage from freezing temperatures. A professional landscaper can provide guidance on the specific steps needed to winterize a landscape.
Water-Saving Tips for Your Garden
Gardening is a great way to beautify your home while also providing fresh produce. However, it can also be a significant source of water consumption. With water becoming an increasingly scarce resource, it’s important to find ways to conserve it. Water-saving tips for your garden can help you save water and reduce your water bill.
There are many ways to save water in your garden. One of the easiest ways is to choose plants that are well-suited to your climate and soil type. These plants will require less water and maintenance, saving you time and money. Another way to save water is to use mulch around your plants. Mulch helps to retain moisture in the soil, reducing the need for frequent watering.
In addition to these tips, there are many other water-saving techniques that you can use in your garden. From using drip irrigation systems to collecting rainwater, there are many ways to conserve water while still maintaining a beautiful garden. By implementing these tips and techniques, you can reduce your water consumption and help to protect this valuable resource.
Efficient Watering Practices
Understanding Soil and Plant Needs
One of the most important things to consider when it comes to efficient watering practices is understanding the soil and plant needs. Different types of soil have different moisture retention properties, which means that some soils will require more water than others. For example, clay soil tends to hold onto water for longer periods of time than sandy soil, which means that plants growing in clay soil will require less frequent watering.
Additionally, it’s important to consider the type of plants that are being grown in the garden. Native plants and drought-tolerant plants are great options for conserving water in the garden, as they are adapted to the local climate and require less water to thrive. On the other hand, plants that are not well-suited to the local climate will require more water to stay healthy.
Watering Techniques and Scheduling
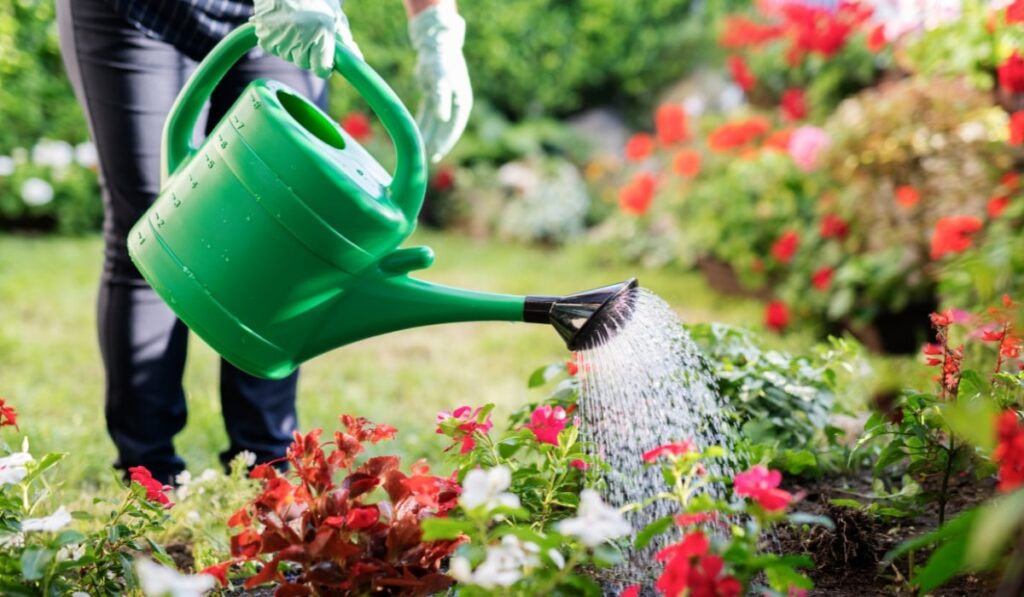
Another important aspect of efficient watering practices is using the right watering techniques and scheduling. For example, morning watering is generally recommended as it allows plants to absorb moisture before the heat of the day causes evaporation. Deep watering is also important, as it encourages plants to develop deep root systems that can better withstand dry spells.
It’s also important to consider the timing and frequency of watering. Overwatering can lead to fungal diseases and runoff, which can be harmful to the environment. Gardeners should aim to water their plants only when necessary, and to avoid watering during periods of rain or high humidity.
Irrigation System Efficiency
For those who use an irrigation system, it’s important to ensure that the system is as efficient as possible. This can be achieved by using water-efficient emitters, installing a rain-shutoff device, and regularly checking and maintaining the system. Irrigation system controllers can also be used to schedule watering times and ensure that water is not wasted.
In addition to these tips, gardeners can also consider using rain barrels or other rainwater harvesting systems to save water in the garden. Mulching and composting can also help to conserve water and improve soil moisture retention. By following these water-saving tips and using efficient watering practices, gardeners can help to promote sustainability and conserve water in their gardens.
Sustainable Garden Design and Maintenance
Choosing the Right Plants
Choosing the right plants for a sustainable garden is crucial. Native plants, drought-tolerant plants, succulents, and perennials are great options for water-saving gardens. These plants require less water, are adapted to the local climate, and are more resistant to pests and diseases. Yucca and verbena are examples of beautiful and low-water-use plants that can thrive in a water-saving garden.
Mulching and Ground Cover
Mulching is an effective way to reduce water usage in the garden. Organic mulch such as lawn clippings, leaves, and compost can help retain moisture in the soil, prevent weed growth, and improve soil health. Ground cover plants such as creeping thyme, clover, or sedum also help to retain moisture and reduce erosion.
Alternative Water Sources and Collection
Using alternative water sources can be a game-changer for water-saving gardens. Rainwater harvesting is a great way to collect water for the garden. Installing a rain barrel or water tank can help to store and use rainwater for irrigation. Ollas are also a great way to save water. These clay pots are buried in the soil and slowly release water to the roots of the plants, reducing water waste and promoting plant growth.
By implementing sustainable garden design and maintenance practices such as choosing the right plants, mulching and ground cover, and using alternative water sources, gardeners can create beautiful and thriving gardens while conserving water and promoting sustainability.
Frequently Asked Questions
What are effective methods for reducing water usage in your garden?
There are several effective methods for reducing water usage in your garden. One of the most effective ways is to choose plants that are native to your region and are adapted to the local climate. These plants will require less water and maintenance compared to non-native plants. Additionally, using mulch around the plants can help retain moisture in the soil, reducing the need for frequent watering.
How can you conserve water when maintaining a vegetable garden?
To conserve water when maintaining a vegetable garden, it is important to water the plants deeply but less frequently. This encourages the roots to grow deeper and access water from lower layers of soil. Additionally, using drip irrigation or a soaker hose can help deliver water directly to the roots, reducing water waste. Using a rain barrel to collect rainwater can also provide a free source of water for your garden.
What are the benefits of watering plants early in the morning for water conservation?
Watering plants early in the morning is beneficial for water conservation because the cooler temperatures and lower wind speeds help reduce evaporation. Additionally, watering in the morning allows the plants to absorb the water before the heat of the day, reducing the risk of water stress.
What personal habit changes can lead to significant water savings in garden care?
Personal habit changes that can lead to significant water savings in garden care include using a broom instead of a hose to clean patios and driveways, fixing leaks in hoses and sprinklers, and using a bucket instead of a hose to wash cars. Additionally, reducing the frequency of lawn watering and using drought-tolerant plants can help save water.
How can you utilize greywater from showers and baths for gardening purposes?
Greywater from showers and baths can be utilized for gardening purposes by diverting the water to a holding tank or directly into the garden. However, it is important to use biodegradable and non-toxic soaps and detergents to avoid harming the plants. It is also recommended to use greywater for non-edible plants only.
What are the most efficient irrigation techniques for minimizing water waste in gardens?
The most efficient irrigation techniques for minimizing water waste in gardens include drip irrigation, soaker hoses, and micro-sprinklers. These methods deliver water directly to the roots of the plants, reducing water waste due to evaporation and runoff. Additionally, using a rain sensor or a smart irrigation controller can help adjust watering schedules based on weather conditions, further reducing water waste.
Choosing the Best Evergreens for Your Landscape
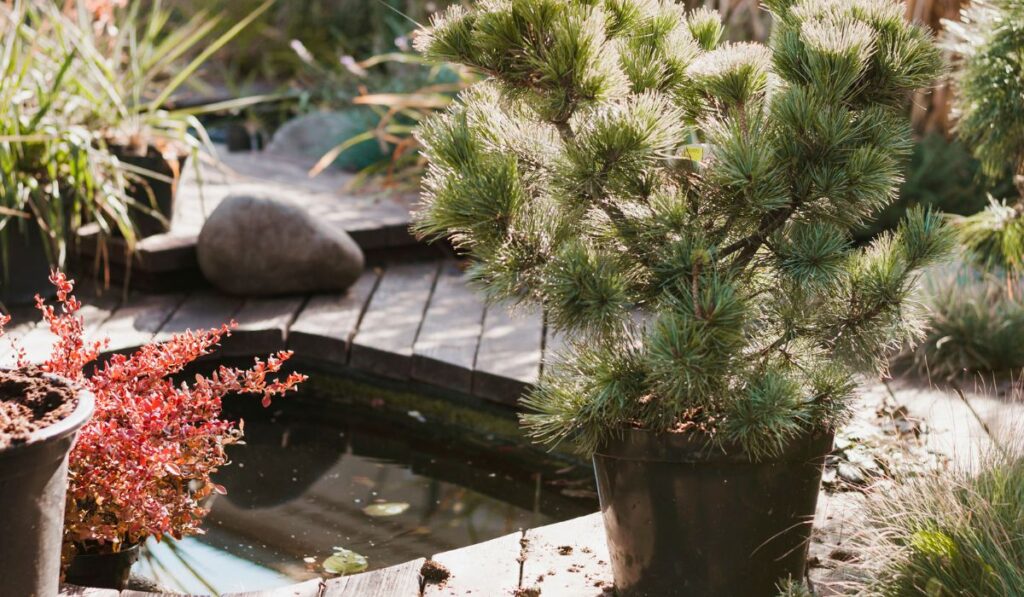
In the world of landscaping, evergreens are akin to the steadfast friends who stand by you year-round, irrespective of the season. They provide a constant splash of color when the rest of your garden has succumbed to the winter chill.
At DK Landscaping, we understand that choosing the right evergreens is crucial to ensuring your garden remains vibrant and dynamic throughout the year. Here’s a comprehensive guide to help you with your evergreen landscaping projects.
Understand Your Landscape’s Needs
Before diving into the plethora of evergreen landscaping options, it’s essential to assess the specific needs of your landscape. Consider the following:
- Climate Zone: Evergreens vary in their hardiness. Ensure the species you choose can thrive in your area’s climate.
- Soil Type: The success of an evergreen largely depends on the soil it’s planted in. Know your soil type and choose plants that will flourish in those conditions.
- Space and Size: Account for the mature size of the evergreen to ensure it fits well in your space without overcrowding.
- Sunlight: Some evergreens prefer full sun, while others thrive in partial shade. Understand the sunlight patterns in your landscape to make an informed choice.
Types of Evergreens
Evergreens come in various forms – trees, shrubs, and groundcovers. Each brings its unique aesthetic and functional qualities to your landscape.
Evergreen Trees
- Spruce (Picea spp.): With their classic Christmas tree shape, spruces are a popular choice. They offer dense foliage and can act as excellent windbreaks or privacy screens.
- Pine (Pinus spp.): Pines are known for their long, slender needles and are often used for their fast growth and stately appearance.
- Cedar (Cedrus spp.): Cedars are valued for their distinctive, often aromatic wood and rugged, shaggy appearance, adding a rustic charm to the landscape.
Evergreen Shrubs
- Boxwood (Buxus spp.): Boxwoods are versatile shrubs, perfect for creating hedges or topiaries. They’re known for their dense, bright green foliage and ease of maintenance.
- Rhododendron (Rhododendron spp.): Besides evergreen foliage, rhododendrons offer spectacular blooms, adding a splash of color to your garden in the spring.
- Holly (Ilex spp.): With their glossy leaves and bright red berries, hollies are both beautiful and great for attracting wildlife.
Evergreen Groundcovers
- Juniper (Juniperus spp.): Junipers are low-maintenance groundcovers that provide excellent erosion control on slopes and add texture to the landscape.
- Creeping Phlox (Phlox subulata): While not evergreen in the traditional sense, creeping phlox offers early spring flowers and retains its needle-like leaves year-round.
- Pachysandra (Pachysandra terminalis): This groundcover thrives in shaded areas where other plants struggle, providing a lush, green carpet.

Aesthetic Considerations
Evergreens are not just about green. They come in a spectrum of colors – from the blue-green hues of the blue spruce to the golden tips of the ‘Sunshine’ ligustrum. The texture of the foliage can also vary greatly, from the soft, feathery fronds of a fern pine to the rigid, needle-like leaves of a holly.
When selecting evergreens, consider how their color, texture, and form will complement your existing landscape. Think about how they will look during different seasons and at various times of the day.
Practical Considerations
Beyond aesthetics, evergreens serve practical purposes in a landscape:
- Privacy: Tall evergreens like arborvitae or clumping bamboo can create a natural privacy screen.
- Windbreaks: Dense evergreens can protect your home and garden from harsh winds.
- Sound Barrier: The thick foliage of evergreens can help reduce noise pollution.
- Wildlife Habitat: Many evergreens provide shelter and food for birds and other wildlife.
Evergreen Maintenance and Care
While evergreens are generally low-maintenance, they do require some care:
- Watering: Newly planted evergreens need regular watering until they’re established. Even drought-tolerant varieties may need extra water during prolonged dry spells.
- Pruning: While most evergreens require little pruning, some may benefit from occasional trimming to maintain shape and health.
- Pest and Disease Management: Be vigilant about pests and diseases. Early detection and treatment can prevent serious damage.
Making the Choice is Ultimately Up to You
When choosing evergreens for your landscape, it’s not just about picking a plant; it’s about creating an ambiance, fulfilling practical needs, and ensuring the overall health and beauty of your garden. At DK Landscaping, we believe that with the right knowledge and a thoughtful approach, you can transform your landscape into a year-round haven of tranquility and beauty.
For More Evergreen Landscaping Ideas, Contact DK Landscaping
Selecting the right evergreens is a nuanced process that involves understanding your landscape’s specific needs, the unique characteristics of different evergreens, and how they fit into the broader aesthetic and practical context of your garden. With careful consideration and a strategic approach, you can ensure that your landscape remains vibrant and dynamic throughout the year, offering a serene and inviting outdoor space that reflects your personal style and meets your practical needs.
Remember, your landscape is a living, evolving canvas, and the evergreens you choose are the strokes that define its character and beauty across seasons. Contact DK Landscaping now for help with your evergreen landscaping projects!
10 Winter Landscaping Tips to Enhance Your Garden

As the brisk air of winter approaches, many assume that landscaping and garden beautification go into hibernation. However, at DK Landscaping, we believe that the colder months offer a unique opportunity to transform your garden into a serene winter wonderland.
With the right strategies and a touch of creativity, you can ensure your outdoor space remains a vibrant, inviting oasis even in the heart of winter. Here are some invaluable winter landscaping tips to enhance your garden.
1. Plan with Evergreens
Evergreen plants are the backbone of a winter garden. Unlike their deciduous counterparts, evergreens retain their leaves all year, providing your garden with continuous color and structure. Incorporating a variety of evergreens can add texture and depth to your landscape. Consider planting evergreen shrubs like holly, boxwood, or rhododendrons, which not only hold their foliage but also offer bright berries or flowers.
2. Embrace Winter Blooms
Believe it or not, some plants thrive in the chill of winter and can bring a splash of color to an otherwise dormant garden. Witch hazel, winter jasmine, and hellebores are known for their ability to bloom in colder temperatures. These winter warriors can break the monotony of a snow-covered garden and are a surefire way to keep your landscaping visually interesting.
3. Focus on Bark and Branches
Winter reveals the underlying structure of your garden, and this can be used to your advantage. Trees and shrubs with distinctive bark or interesting branch patterns can become the focal points of your winter landscape. The peeling cinnamon bark of the paperbark maple or the stark, white bark of the birch tree can add drama and intrigue. Similarly, the twisted branches of a corkscrew hazel can provide an architectural element that is especially striking when dusted with snow.
4. Utilize Hardscaping Elements
Hardscaping—the non-living elements of your landscape like stone walls, patios, and sculptures—becomes particularly prominent in winter. These elements provide structure and continuity when most plants are dormant. Consider adding a stone bench, an arbor, or a garden sculpture to create interest and provide a focal point in your winter garden.
5. Attract Wildlife
Winter can be a tough time for wildlife, so incorporating elements that provide food and shelter can bring your garden to life with the presence of birds and other animals. Berry-producing plants like crabapples or hawthorns can serve as a food source, while birdhouses and feeders can offer shelter and sustenance. Not only does this help the local wildlife, but it also adds a dynamic element to your winter landscape.

6. Illuminate the Beauty
With the days getting shorter, lighting becomes a crucial element of winter landscaping. A well-thought-out lighting scheme can make your garden inviting after dark, highlighting key features and creating a warm ambiance. Use spotlights to accentuate trees or garden structures, and consider path lights for safety and visual interest.
7. Protect Your Plants
Some plants need a little extra help to get through the winter. Mulching can protect plant roots from freezing temperatures and help retain moisture. Wrap delicate shrubs or young trees with burlap to shield them from wind and heavy snow. Remember to gently brush off heavy snow from branches to prevent damage.
8. Incorporate Seasonal Decor
Embrace the season by adding winter-themed decor to your garden. A wreath on the garden gate, a display of evergreen boughs, or a collection of decorative snowmen can make your garden feel festive and inviting. Just be sure to choose decor that can withstand the elements and complement your overall landscape design.
9. Plan for Spring
Winter is the perfect time to plan your garden for the upcoming year. Assess your landscape, noting what worked and what didn’t. Use this time to research new plants and landscaping ideas, and start planning any major projects or renovations. This way, when spring arrives, you’ll be ready to bring your vision to life.
10. Take Care of Garden Tools
Finally, winter is an ideal time to maintain your gardening tools. Clean, sharpen, and oil your tools so they’re ready for spring. Take care of any repairs, and organize your garden shed or storage area. Proper tool maintenance not only prolongs the life of your equipment but also ensures you’re ready to get back to work when the warmer weather returns.
Contact DK Landscaping for More Winter Landscaping Tips
As the winter months unfold, remember that your garden is not just a summer space. With these tips from DK Landscaping, you can create a stunning winter landscape that is both beautiful and functional.
By embracing the unique elements of the season, protecting your plants, and planning for the future, you can ensure that your garden is a year-round retreat. To have us help you create an outdoor oasis of your dreams no matter what season, contact DK Landscaping and let our experts help!
Now, bundle up, step outside, and start seeing the chilly months in a whole new light. Your winter wonderland awaits!
Tree Maintenance – Get Trees Maintained To Ensure Safety
Are you a garden enthusiast who has incorporated several trees within your landscape? Or maybe your home is located near wooded surroundings where trees are a prominent feature? Well if so it may probably be time for you to get started with tree maintenance.
Even though most people don’t like the hassle of carrying out tree maintenance this practice is considered to be extremely essential as it serves to eliminate the threat of damage to property or serious injury come winter.
Tree Maintenance Is A Great Way To Manage Tree Overgrowth
 Despite all the great benefits that having trees in our surroundings provide, they can sometimes grow menacingly out of control. Some may grow tall reaching unbelievable heights while some can spread widely with huge amounts of foliage but regardless of the form of growth they possess they will most likely be a challenging task to manage.
This can not only present several challenges but some dangers as well. So to properly manage this issue pruning, topping, shaping or sometimes even removing trees are great ways in which people can maintain and keep control of trees in their area.
Tree Maintenance Provides Additional Security
Despite the fact that trees help to beautify and improve our surroundings their maintenance is essential to the security of homes and businesses. You see when trees grow out of control they tend to accumulate bushes and overgrowth making it easy for an intruder to conceal themselves.
So maintaining trees and keeping them well groomed and at an appropriate height can serve to keep homes and businesses safe while offering clean, unobstructed, surroundings.
Need Help Getting Your Trees Maintained Before Winter? Let DK Landscaping Inc. Give You A Hand!
With winter just around the corner getting trees in your surroundings maintained is something you should not hesitate to do especially since weather can get a bit extreme during this time. Well here at DK Landscaping we’re aware of the resources and effort
required to maintain trees which is why we’d be happy to come in and give you a hand with any tree maintenance you need performed.
Here at DK Landscaping we like to say that “We like Jungles” as no job is too big or too small for us and we aim to provide the highest quality landscape and gardening services to all clients. Our tree maintenance services are very affordable and we work with clients to manage any type of surroundings. Give us a call at: (707) 280-3632 or visit our website:dklandscaping.com for more information.
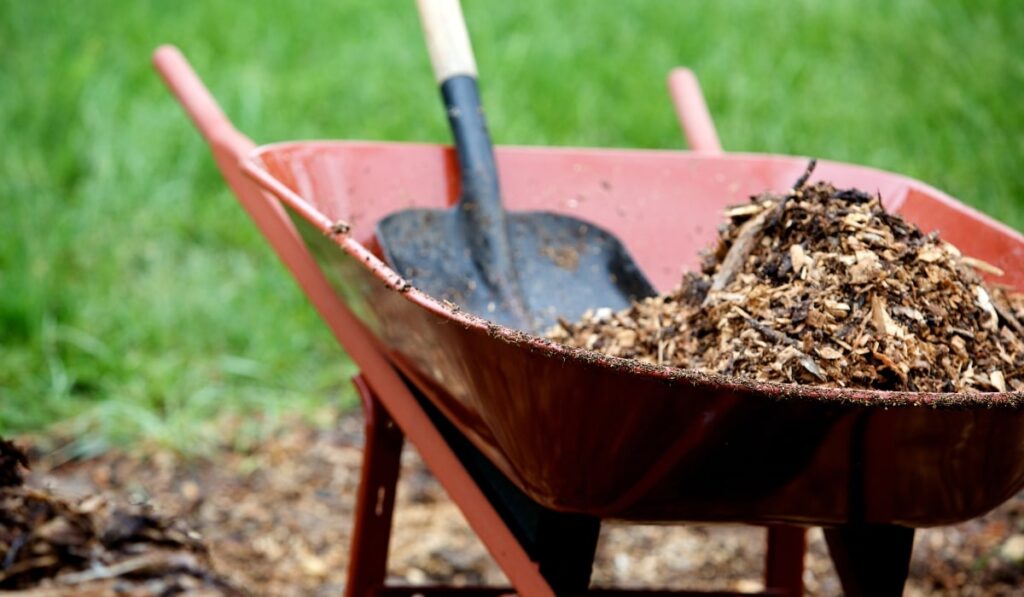
Protect Gardens In Winter By Mulching
Winter is just around the corner and its important to protect your garden from the most unbearable conditions. You want to do all you can to prepare and offer protection for when that time arrives. How do you protect gardens from the snow and ice? The answer is easy, mulching. In preparation for winter this practice is an excellent way to protect your plants during this cold period.
Mulching Helps Plants To Stay Warm In Cold Conditions

A responsible gardener would ensure that they mulch their plants as a preventative maintenance measure. Generally mulching plants in extremely cold conditions helps to provide an effective type of insulation that prevents them from freezing and thawing rapidly. It also serves to prevent plants from becoming shallow-rooted plants and bulbs caused when plants are lifting out of the soil which can damage delicate grafts.
If you experience brutal winters or nighttime temperatures below 20 F. (-8 C.) mulching plants in your garden may be the smartest decision.
Effective Winter Mulching Tips
Mulching is a great way to keep your plants active throughout the winter season and prevents them from becoming dormant. For instance if active plants that aren’t mulched decide to put out new growth at this time there’s a possibility that plant tissues can become damaged by nighttime frost. This can create entry points for many dangerous fungal and bacterial pathogens that are capable of causing serious harm to plants. In a nutshell mulching provides adequate protection to plants ensuring they bloom free of pests.
Gardeners can make use of a variety of organic materials suitable for winter protection including hardwood bark, straw, chopped corn cobs, grass clippings and pine needles. Nevertheless be sure to keep mulch at least one inch away from crowns and stems when making applications to prevent choking, damage or rot.
Gardeners should also take care to remember that organic mulches carry a low nitrogen content therefore before laying mulch you should first fertilize soil with a high-nitrogen product such as blood meal or fish meal to increase nitrogen levels in the soil.
Need Help With Winter Mulching? Dk Landscaping Inc. Is Here To Help
If you don’t know what to do or need help with your winter mulching don’t hesitate to give us a call at DK Landscaping Inc. at: (707) 280-3632 we’d be happy to come and give you a hand.
Here at DK Landscaping we strive to offer the highest quality landscaping and gardening services in Northern California.. Give us a call today or you can contact us online for more information on how you can take better care of your garden.
Tips to Get Gardens Ready for Winter
With the year slowly coming to an end and winter quickly approaching the outdoors can turn into a dull and inhospitable place forcing most people to remain indoors however, for garden and landscape enthusiast alike this time of year is the ideal time to prep gardens, lawns and surrounding landscapes for the upcoming growing season.
Keep Gardens in Shape During Winter

In the fall or just before winter most trees lose their foliage however at this time maintenance practices like pruning or trimming are encouraged during the latter months of the year as during this time of dormancy the majority of hedges, shrubs and trees can be pruned or trimmed without causing damage to the plant or tree.
This practice not only eliminates dead cumbersome branches from trees and plants but it also helps to improve their growth and shape while maintaining the general health of gardens.
As for the multitude of leaves that constantly fall and cover gardens at this time of year making it a practice to regularly clean gardens is extremely important as it allows garden beds and lawns to receive adequate sunlight which helps to promote optimal growth and health.
Another very important factor that gardeners should consider when preparing gardens for winter is the protection of plants from potential damage or destruction. Given the extreme conditions that come along with winter one clever tip that has proven to be an effective approach for protecting gardens during this extreme period is mulching.
Mainly used to help soil to retain moisture, regulate soil temperature and suppress weed growth mulching is also a great way to shield and protect plants against the hostile conditions of winter. Planting beds should be mulched at a depth of 1.5 – 2 inches to ensure plant roots remain the right temperature as well as to offer the right amount of protection from any potential damage.
Contract a Professional Landscaping Service
Not everyone may have the equipment to carry out trimming and pruning effectively and as for large, dead, trees and decayed branches hanging around gardens it’s best to contract trained professionals to manage tasks such as these since decayed trees and branches can pose serious threats of injury. Therefore contracting a professional landscaping service to manage tasks that might require equipment and trained personnel is the safest option.
Need Help with Preparing Your Garden for Winter?
Here at DK Landscaping Inc. we understand how tedious it can be to manage gardens on your own however we like to say that “We like Jungles” and we’d be happy to come in and assist you with all your garden preparations for winter.
We aim to provide the highest quality landscaping and gardening services to all clients. Our services are very affordable and we work with clients to manage any type of surroundings. Give us a call at: 707 217-6508 or visit our website: dklandscaping.com for more information.
How Mulching Can Benefit Your Garden
In seeking to maintain or improve the growth and health of trees, plants and flowers in gardens there are several practical, techniques that gardeners can apply. One approach that has proven to be very effective in helping to promote the health of gardens is mulching.
Mulching can be used for Multiple Purposes

Mulching refers to the practice of applying a layer of material to the surface of soil. Mainly it is used to improve soil health and fertility, retain soil moisture and reduce weed growth. Mulching can be utilized in several different, areas including vegetable gardens, flower beds and surrounding landscapes. It is so effective that it allows gardeners to spend less time plucking up weeds, watering gardens and fighting pests.
Apart from its main uses mulch can also be used to lend additional support to plants by helping to stabilize them as well as help to enhance the visual appeal of gardens.
Types of Mulch Gardeners can Utilize when Mulching
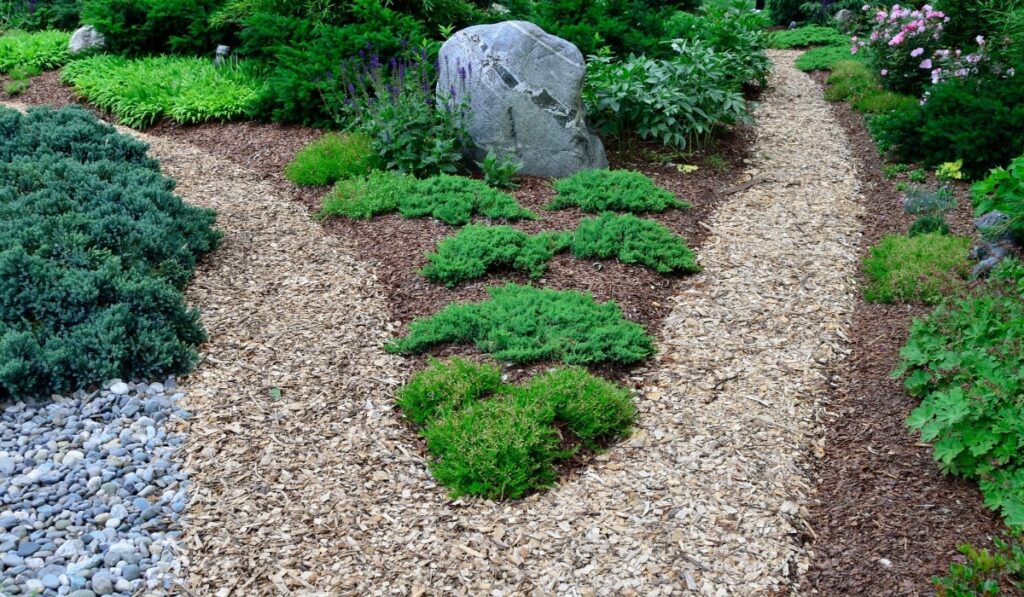
When mulching gardens there are two basic kinds of mulch that gardeners can use these are organic or inorganic mulches. Generally organic mulches consist of numerous materials including straw, grass clippings, chopped leaves, shredded bark, wood chips and sawdust and inorganic mulches are mainly comprised of gravel, stones, geotextiles and black plastic.
Nevertheless both types of mulch can be used to deter weed growth and improve soil quality however with organic mulches soil is improved gradually as the organic material decomposes while inorganic mulches don’t.
Important Tips to Consider
If mulching to combat weeds there are a few things that people should keep in mind if it is to be done properly and effectively. Firstly it is recommended that mulch be laid down over soil that has already been weeded and secondly it should be laid down thick enough to discourage the reappearance of new weeds.
Considering this the thickness of mulch placed over soil should range around 4- 6 inches though a 2- 3 inch layer normally suffices in areas that have more shade and weed growth is not as prevalent.
Another very essential tip gardeners can utilize when mulching is the addition of nitrogen products to soil. Products like blood meal or fish meal can be used and should be applied before the mulch is laid as organic mulches usually have a low nitrogen content and this can help to increase nitrogen levels in soil so that plants get the desired nutrients.
Nevertheless one of the most important things that gardeners should take care to remember when mulching is how they place the mulch. When laying down mulch it should be kept no less than an inch away from crowns and stems of plants. This is mainly because wet mulch resting against the stems of flowers and vegetables can cause rot. Therefore it would be wise to ensure that mulch is placed at the appropriate distance to prevent this from happening.
Need Help with Mulching Your Garden?
If you don’t know what to do or need help mulching a large garden area don’t hesitate to give us a call at DK Landscaping Inc. at: (707) 280-3632 we’d be happy to come and give you a hand.
Our services are prompt and professional and our prices affordable. Here at DK Landscaping we strive to offer the highest quality landscaping services to clients so give us a call today or you can check out our website: dklandscaping.com to have a look at the services we offer.


